
Scheduling and configuring a room in eSuite, with best practices for roles, witnesses, and multi-day matters.
This guide walks the room setup form from top to bottom. Steps 1 through 11 follow the form in order, with best practices alongside the steps they apply to. The Setup Playbook at the end covers the situations that span several steps: people filling two roles, witnesses who join without being on the list, observers, and multi-day matters.
Not every option below appears on every account. Sections are shown only when your plan includes them, so if you do not see something described here, that feature is not on your plan.
There are two valid approaches to running a proceeding here, and the choice shapes several of the steps below. Decide which one you are using before you schedule, because it determines both your Room Access setting and how much of the attendee list you build up front.
Add every attendee to the room with their role and permissions before the event, and set Room Access to Invite Only, or Invite + Guests if you also want a safety net.
Everyone arrives verified by a code sent to their own email address, already labelled, with the right permissions from their first second in the room. The witness is designated before anyone joins, so they are pinned and separated from deposing counsel immediately and the witness recording layouts have someone to follow. Teams are set, so team chat works from the start. Afterwards your usage report shows verified identities rather than typed-in names.
Add only the host or hosts to the attendee list, set Room Access to Invite + Guests with Guest Access Mode on Standard, and let everyone else join as a guest. A host then designates roles and grants permissions from the participant list as people arrive.
This is the right choice when you do not know who is attending, or the list is still changing on the day. The trade-offs are real: a host has to be doing this while the proceeding is getting under way, anyone not yet designated is sitting in the room with guest permissions, the witness is not pinned or separated from deposing counsel until a host designates them, teams are not set, and guests are self-identified rather than verified, so the record of who attended is whatever each person typed.
These are not exclusive, and the common shape is both at once: the first approach for the people you know (counsel, the witness, the court reporter, the videographer) and the second as the fallback for whoever turns up unlisted. That combination is exactly what Invite + Guests exists for.
BEST PRACTICE: Put the witness on the list even if you do nothing else in advance
The witness is the one role that changes the room for everyone: they are pinned, kept out of private contact with deposing counsel, and followed by the witness recording layouts. Designating them ahead of time means those rules hold from the first second rather than from whenever a host gets to it. If you know who the deponent is and have their email address, add them, whichever approach you are otherwise taking.
Sign in with your email address. You land on your event calendar. The top navigation moves between Calendar, Rooms, Exhibits, Recordings, Reports, Transcripts, and Settings. The calendar itself toggles between Month, Week, and Day.
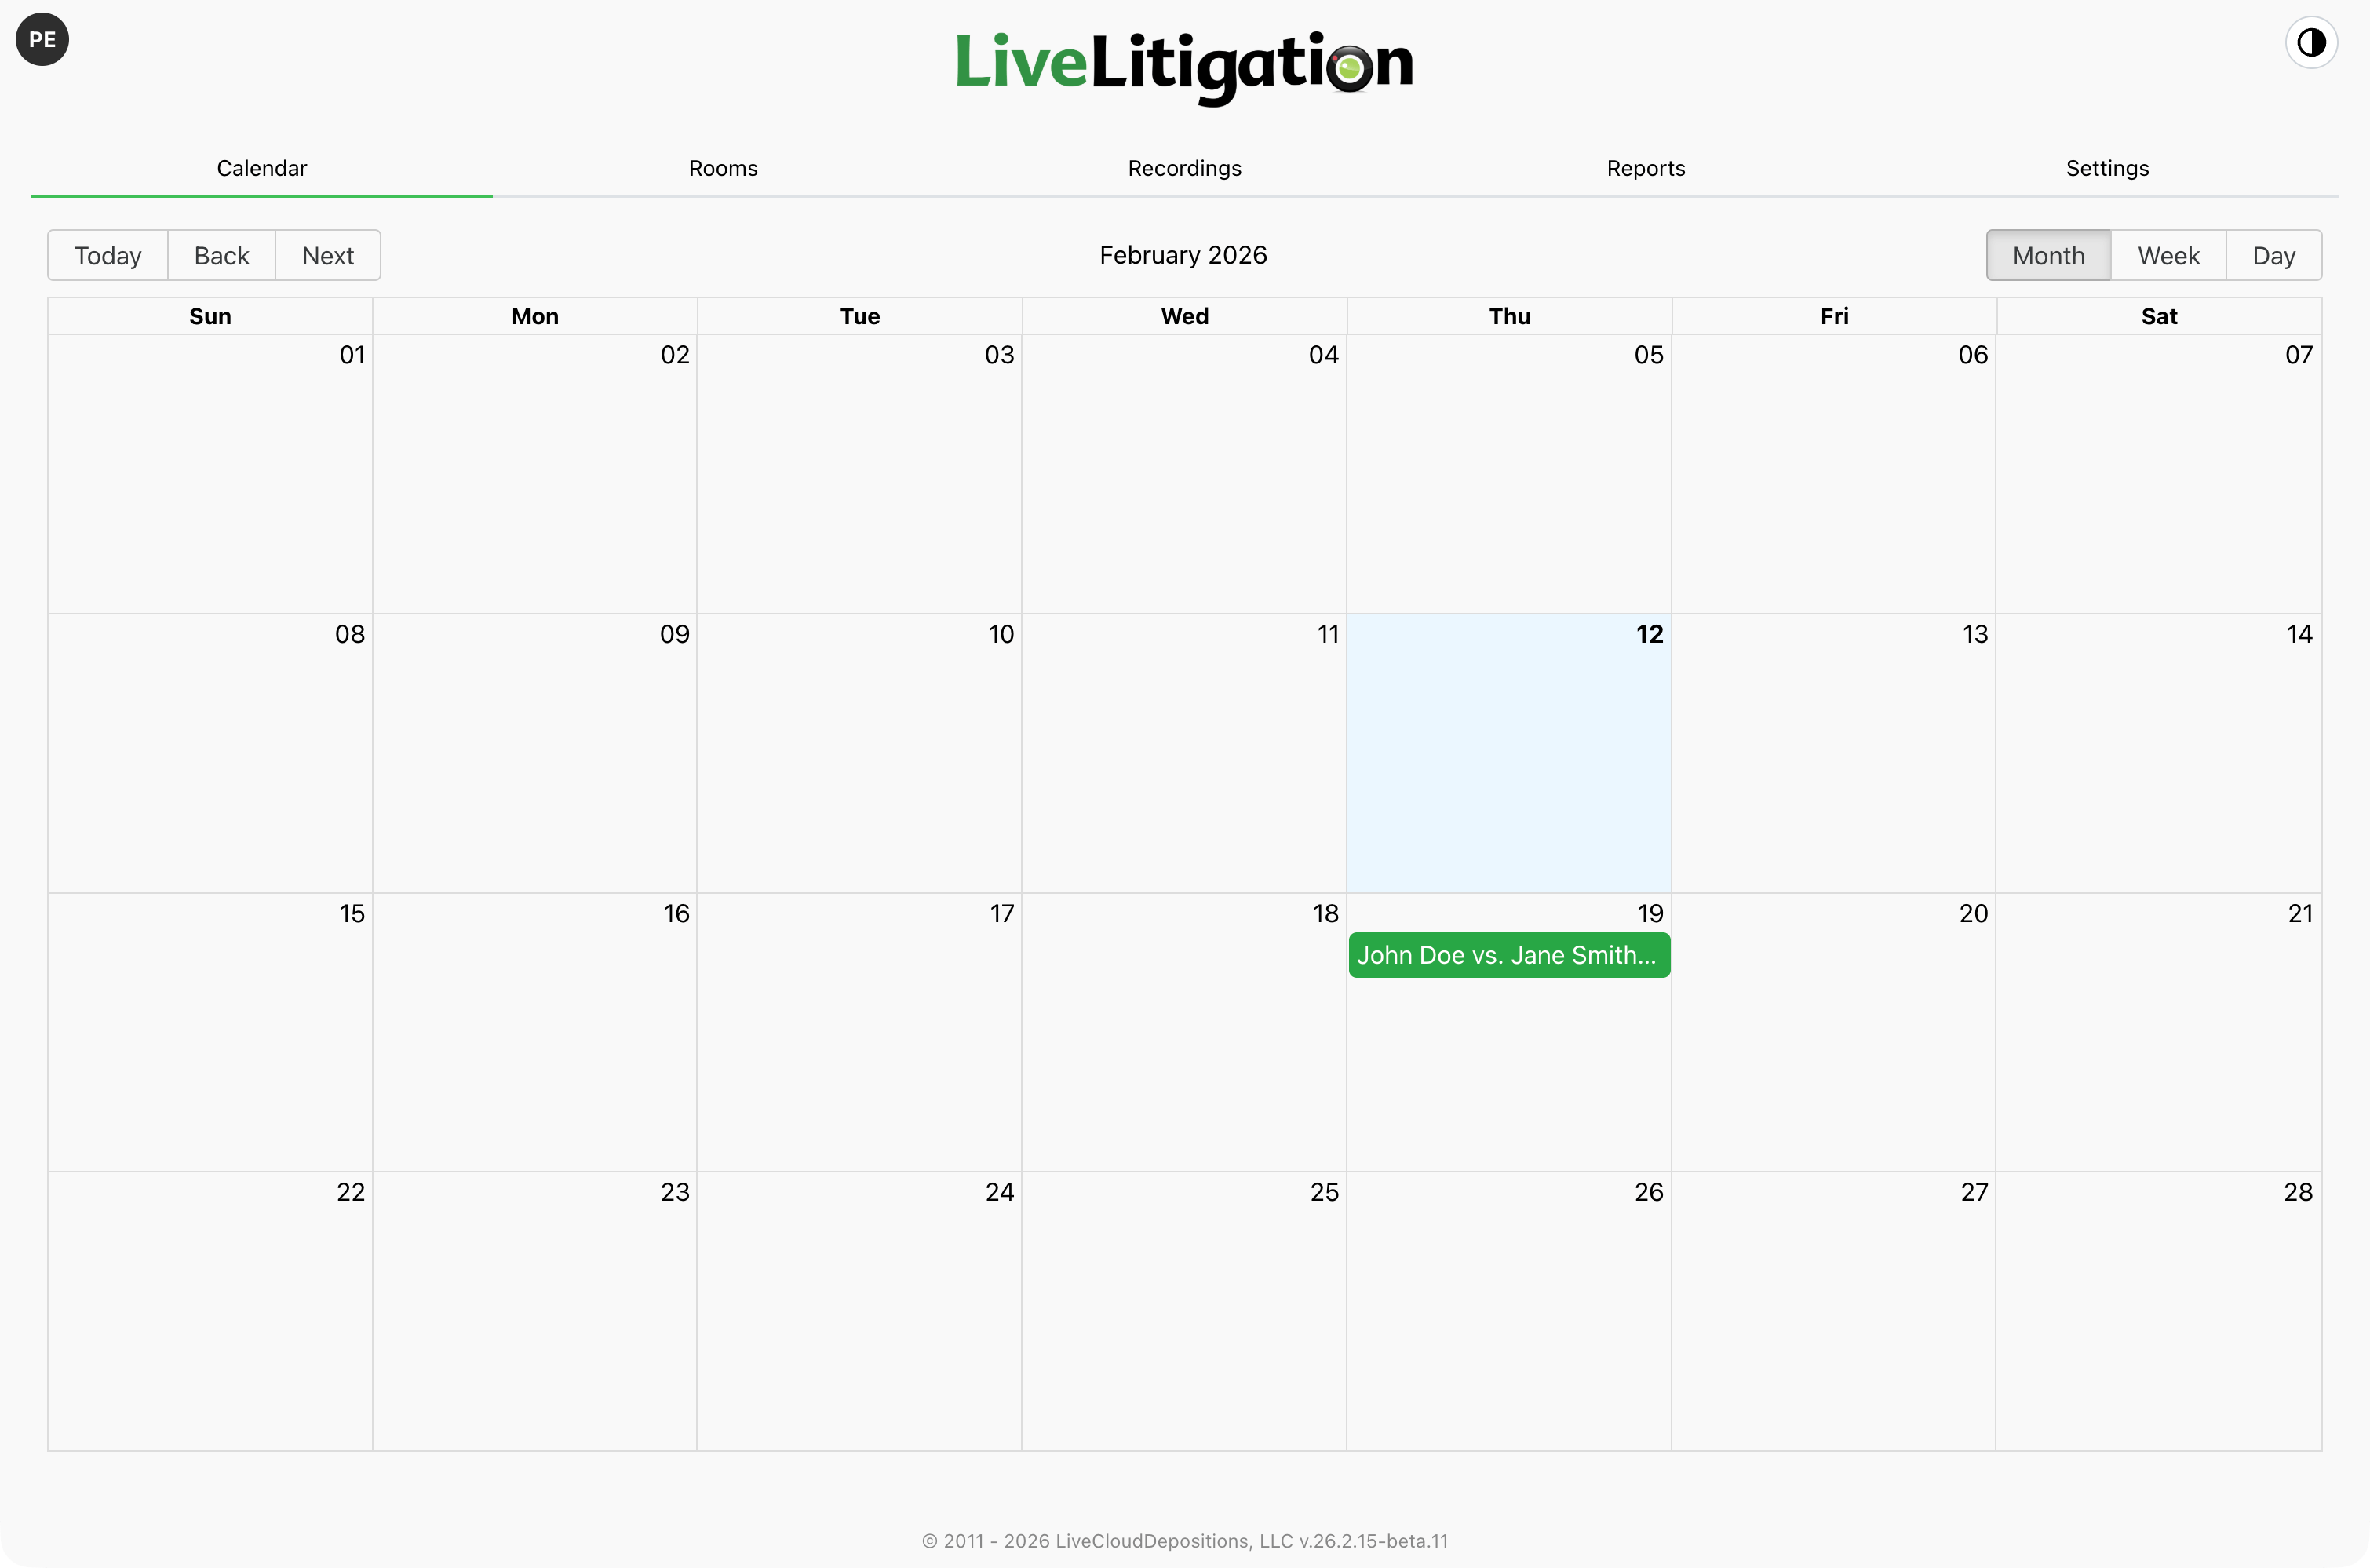
Double-click a date on the calendar to schedule a room for that day, or open the Rooms tab and click Create Room.
The Rooms list shows each room’s Room ID, start time, lock state, and verification status. Selecting a room reveals actions to Join, Edit, Share, Invite, or Disable it.
Room setup is a single scrolling form rather than a wizard. You can work through it in any order, and everything can be changed later with Edit.
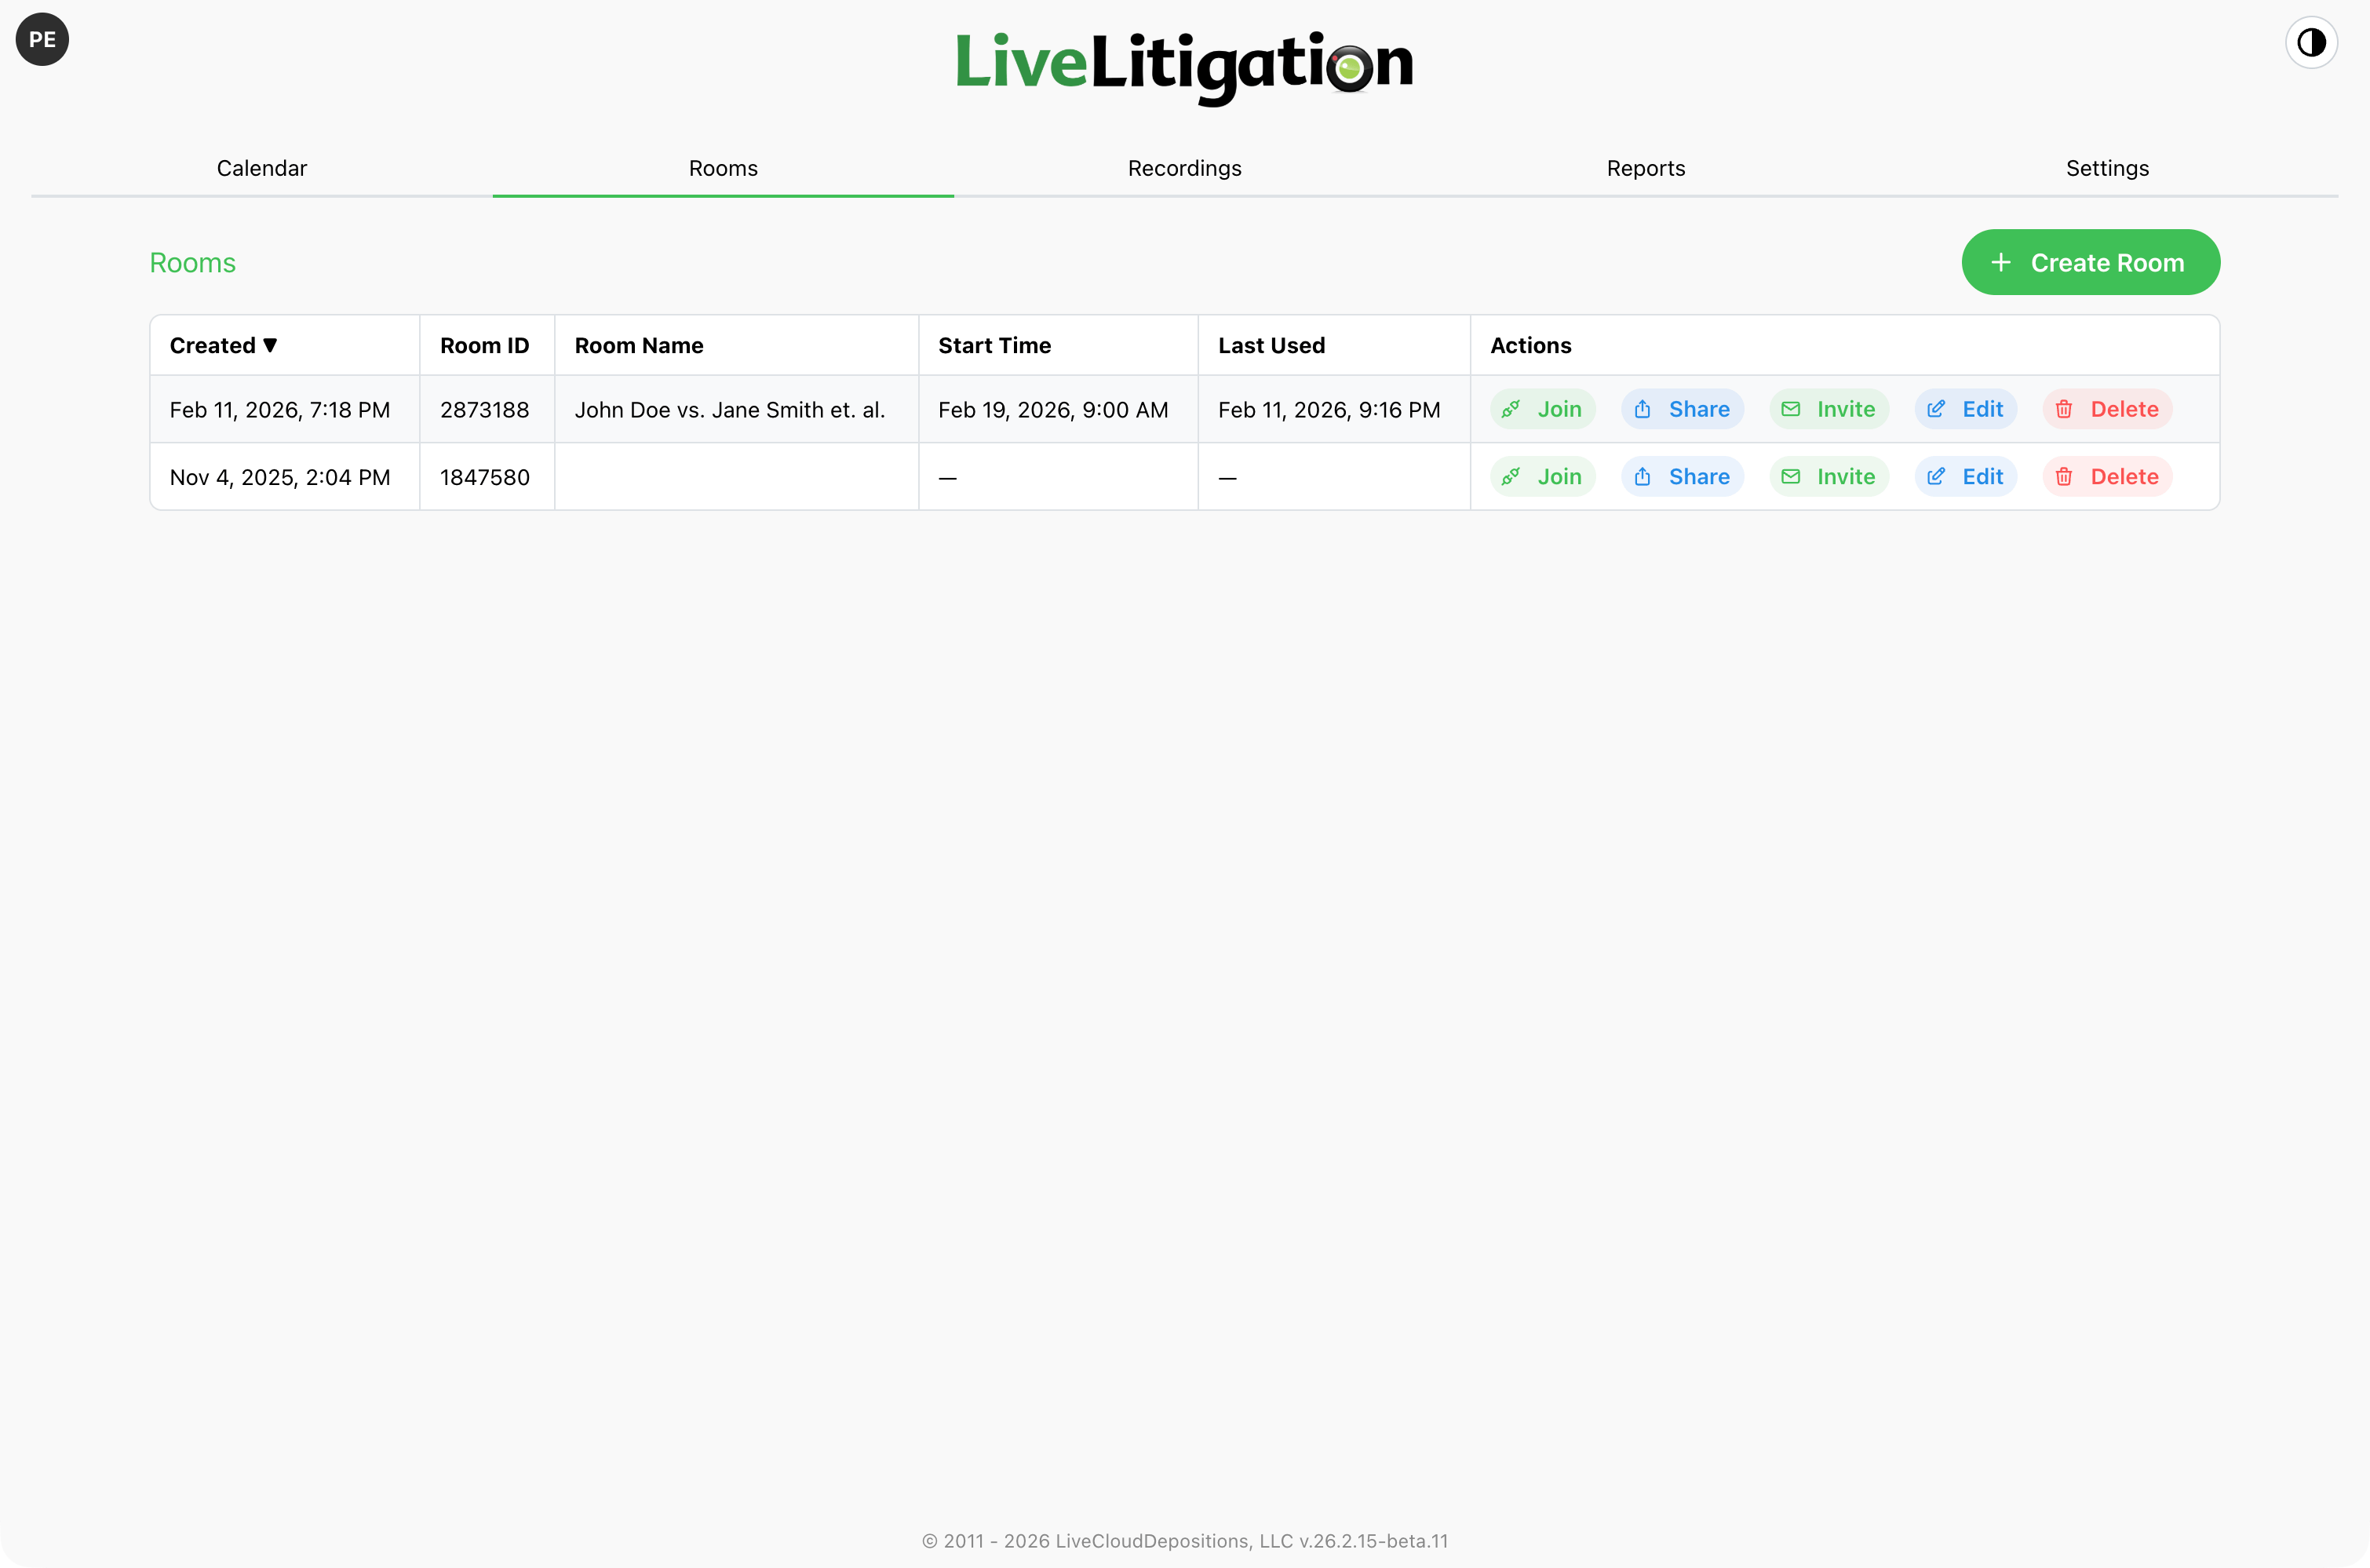
Enter a Room Name: the case name, matter name, or another identifier your team will recognize later.
Above the name, Room Template applies a saved configuration preset. Templates are created and managed in Settings, under Room Templates, and the Manage Templates link takes you straight there. If one template is starred as the default, it is applied automatically whenever you open this form. Templates apply only while creating a room: editing an existing room does not offer them.
BEST PRACTICE: Save a template for each kind of proceeding you run
A template carries every non-per-event setting: features, recording layouts, access policy, session limits. It never carries a schedule and never carries an attendee list, so one matter’s participants cannot follow it into another. Two or three templates, for example “Deposition Standard,” “Arbitration,” and “Quick Meeting,” save you most of this form each time and keep your setup consistent from one event to the next. You can save up to ten.
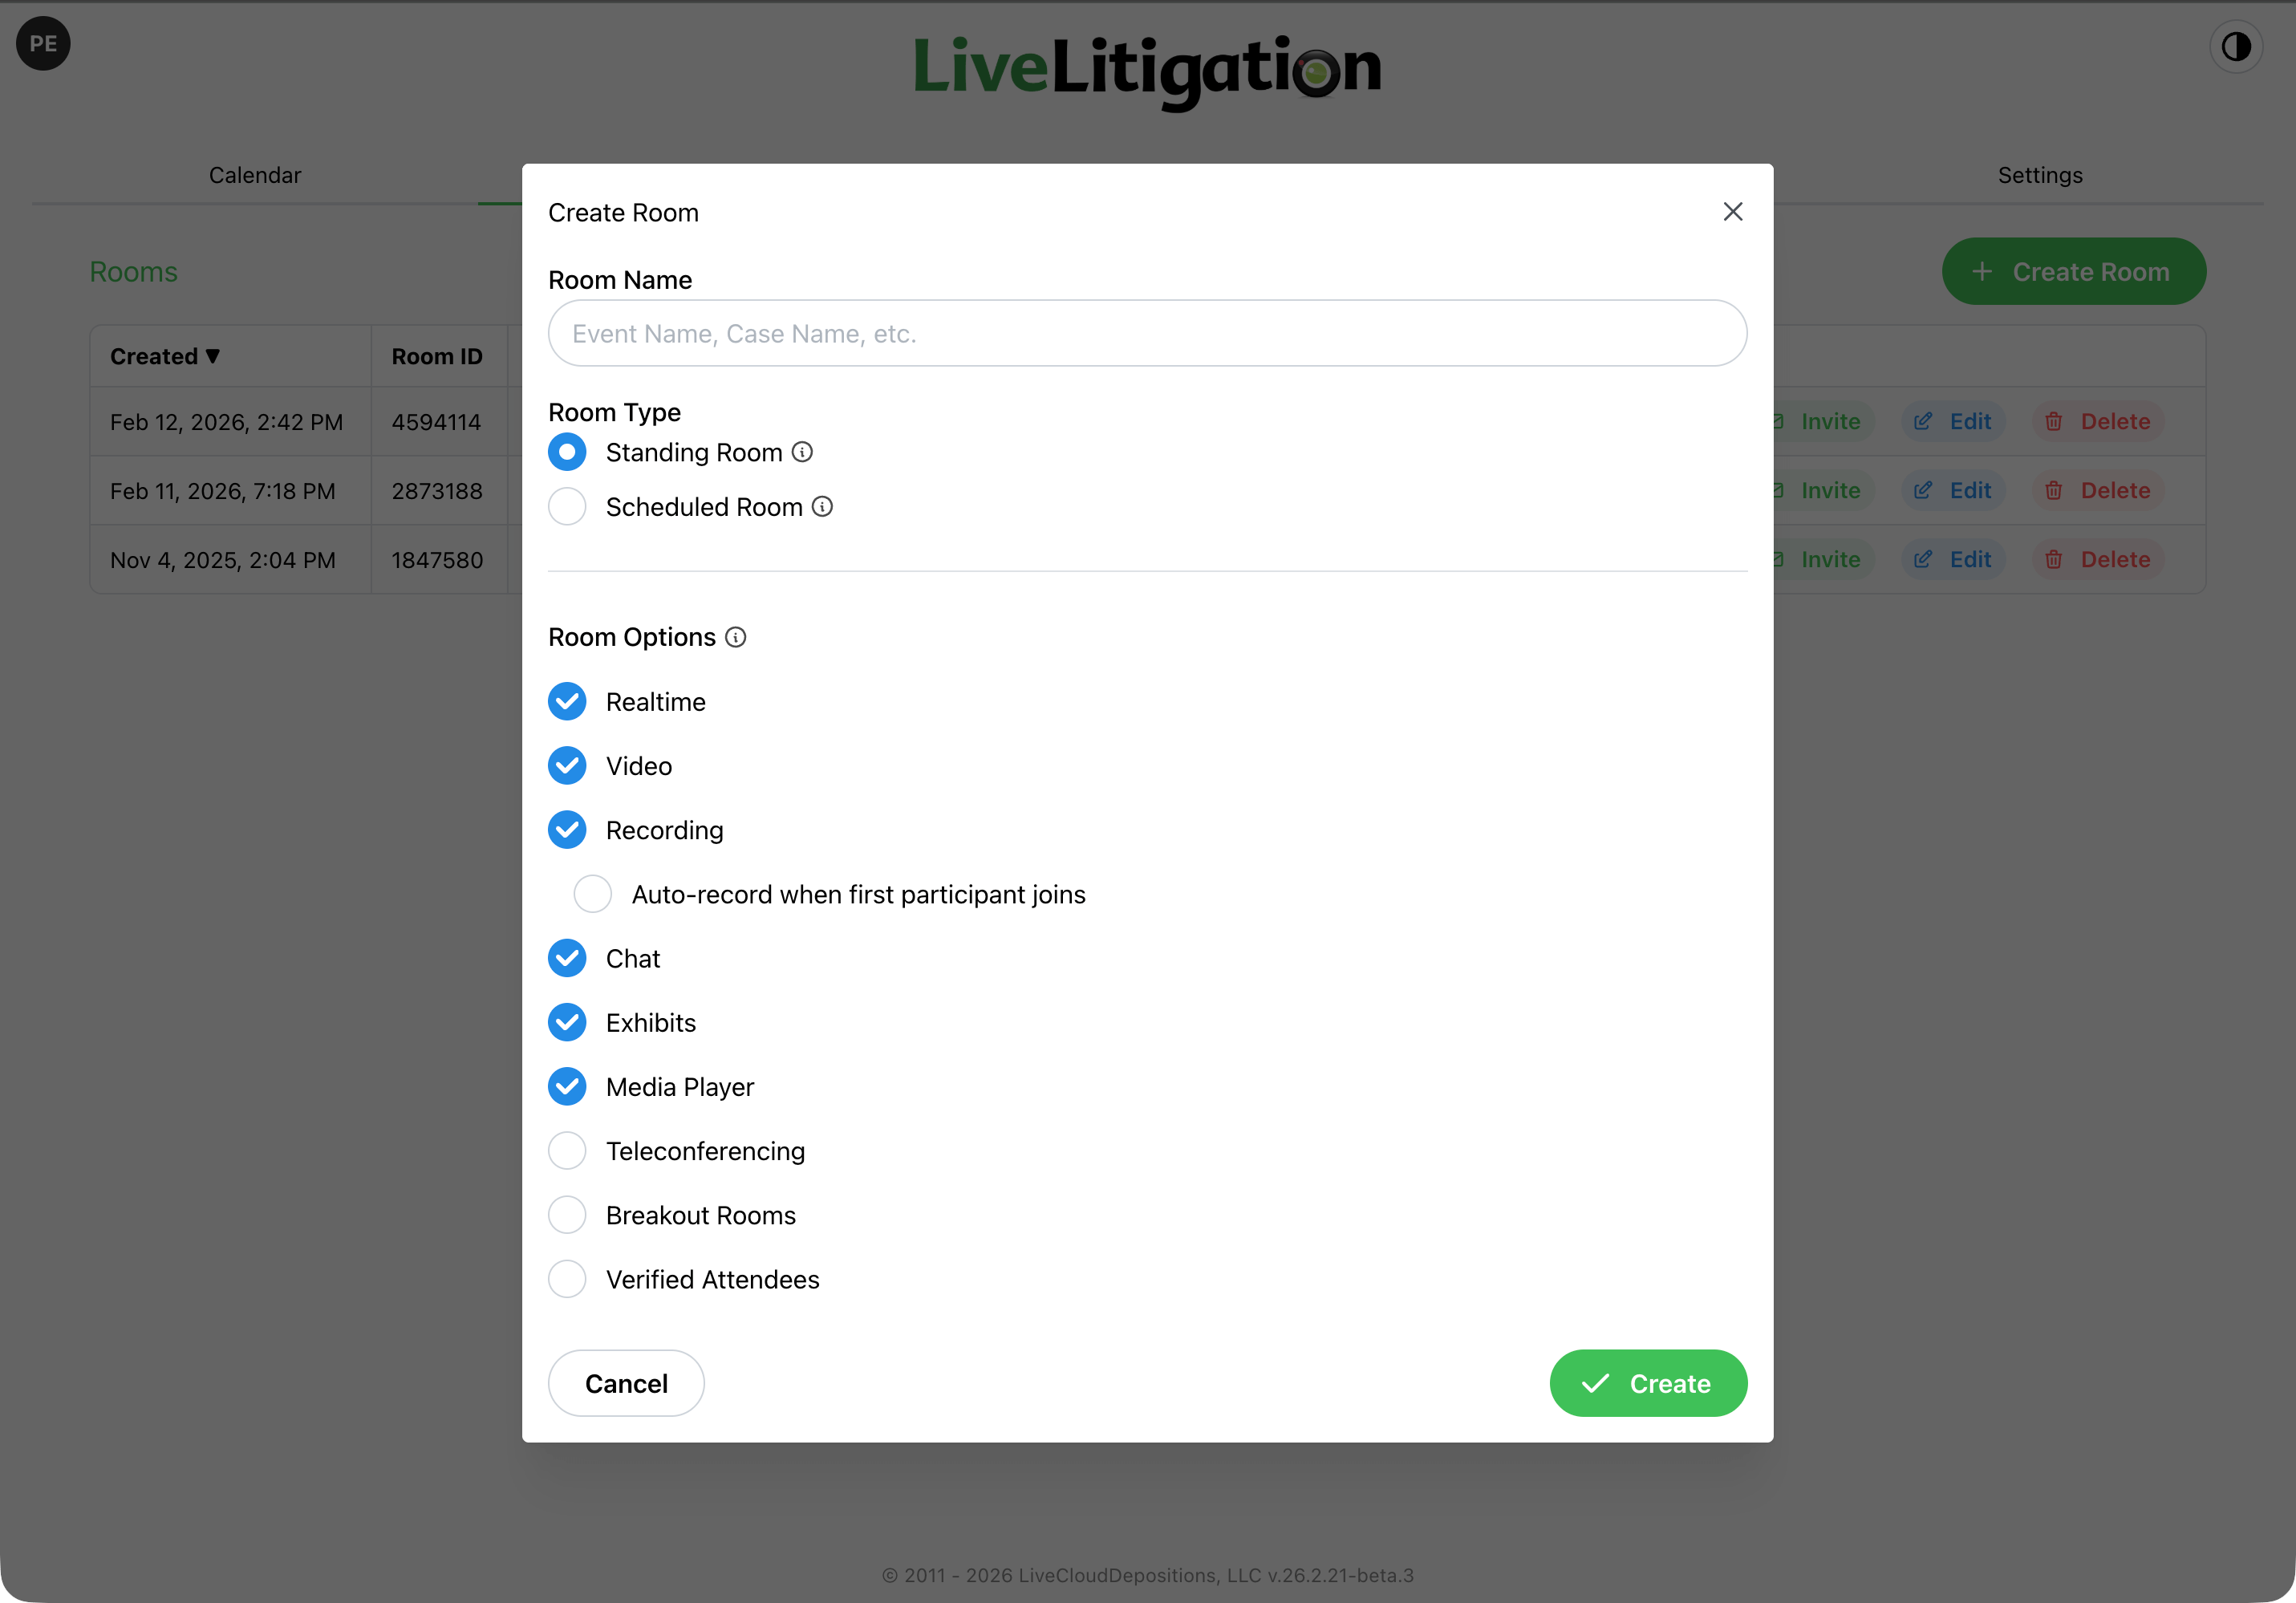
Choose a Room Type:
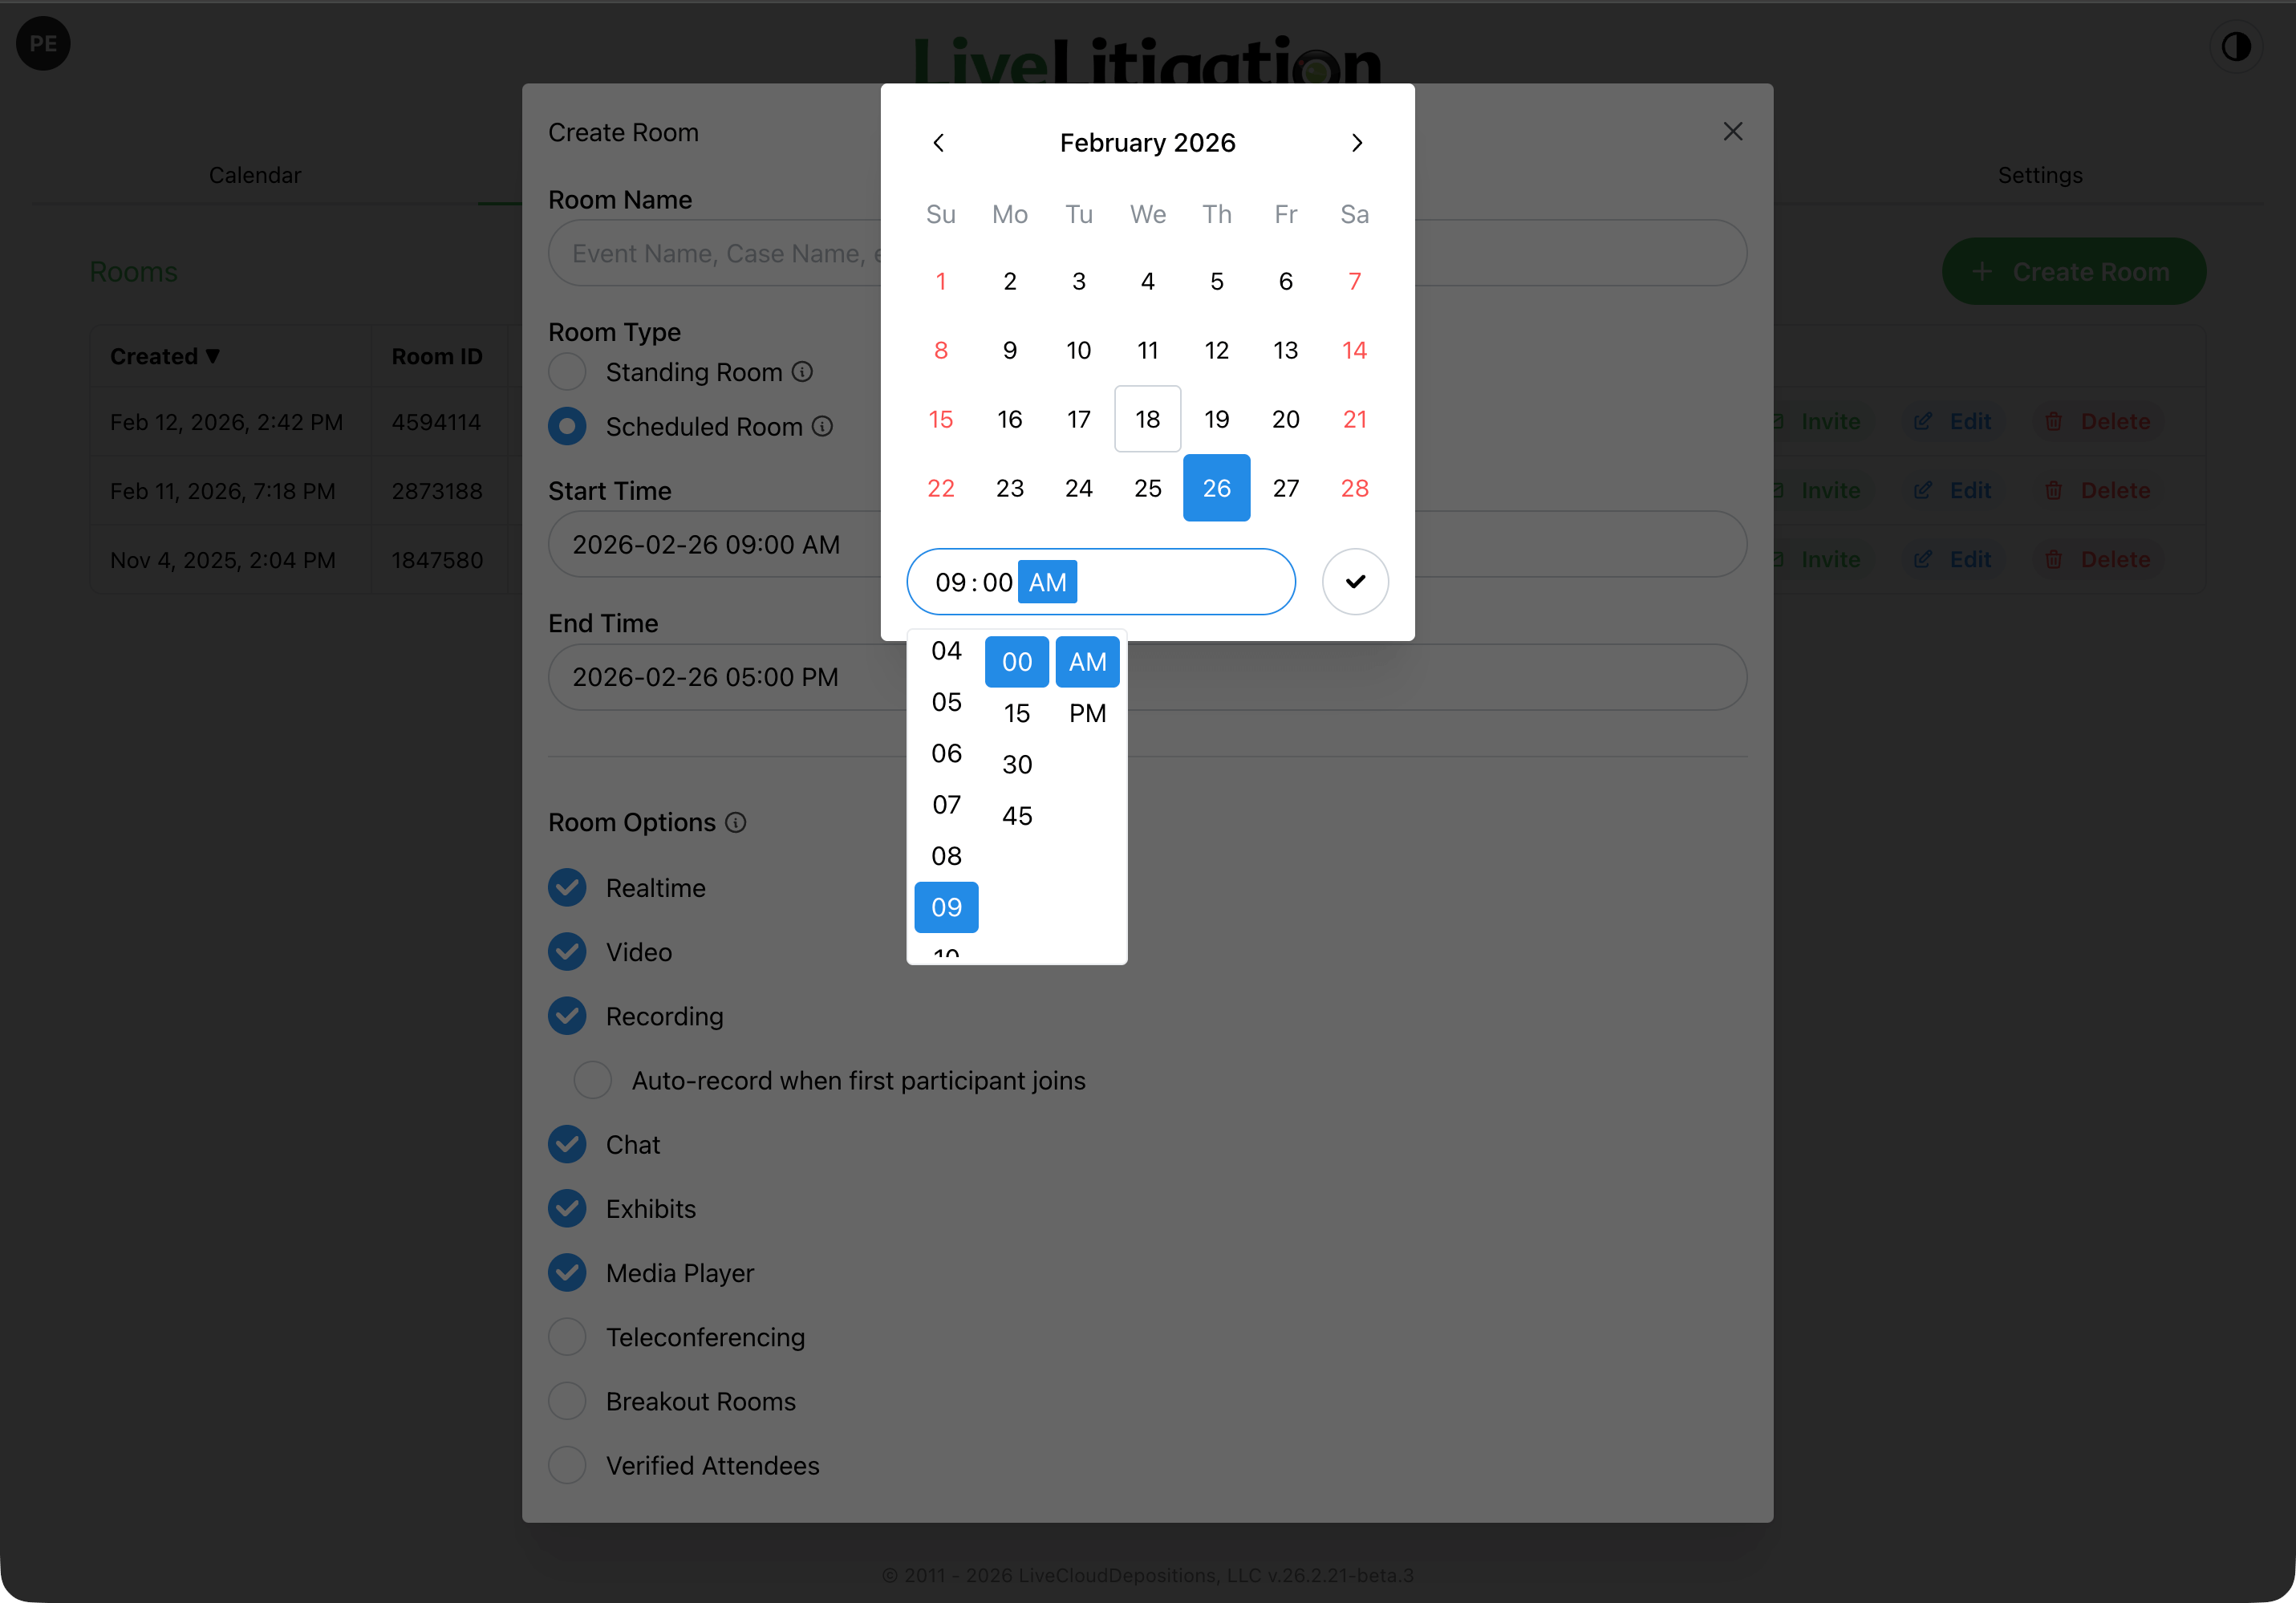
A scheduled room asks for a Start Time and a Duration rather than an end date. A room’s schedule is a list of days, and the hint beside the duration shows you when that day ends.
For a matter that runs across several days, use the two buttons under the start time:
BEST PRACTICE: Keep a multi-day matter in one room
Adding days to a single room keeps one Room ID, one attendee list, one exhibit set, and one invitation for the whole matter. A separate room per day spreads your exhibits and reports across several rooms and gives attendees a different link each day.
Time Zone is where the event takes place.
Past five hand-picked days, a notice offers to Convert to Standing Room. That is usually the better fit when the room simply needs to stay open, since every invited attendee otherwise receives a calendar block on each of those days.
If your account is connected to Clio Manage, an Integrations section lets you attach the room to a matter. Search for and select a Clio Matter. The link is what allows transcripts, recordings, and exhibits to sync back to Clio afterwards.
Once a matter is selected, a Calendar Sync choice appears. It is offered when you first create the room:
BEST PRACTICE: Attach the matter while you are creating the room
The Calendar Sync options are offered during creation, and the matter link is what carries the finished transcripts, recordings, and exhibits back to Clio. Attaching it now saves reconciling the files by hand later.
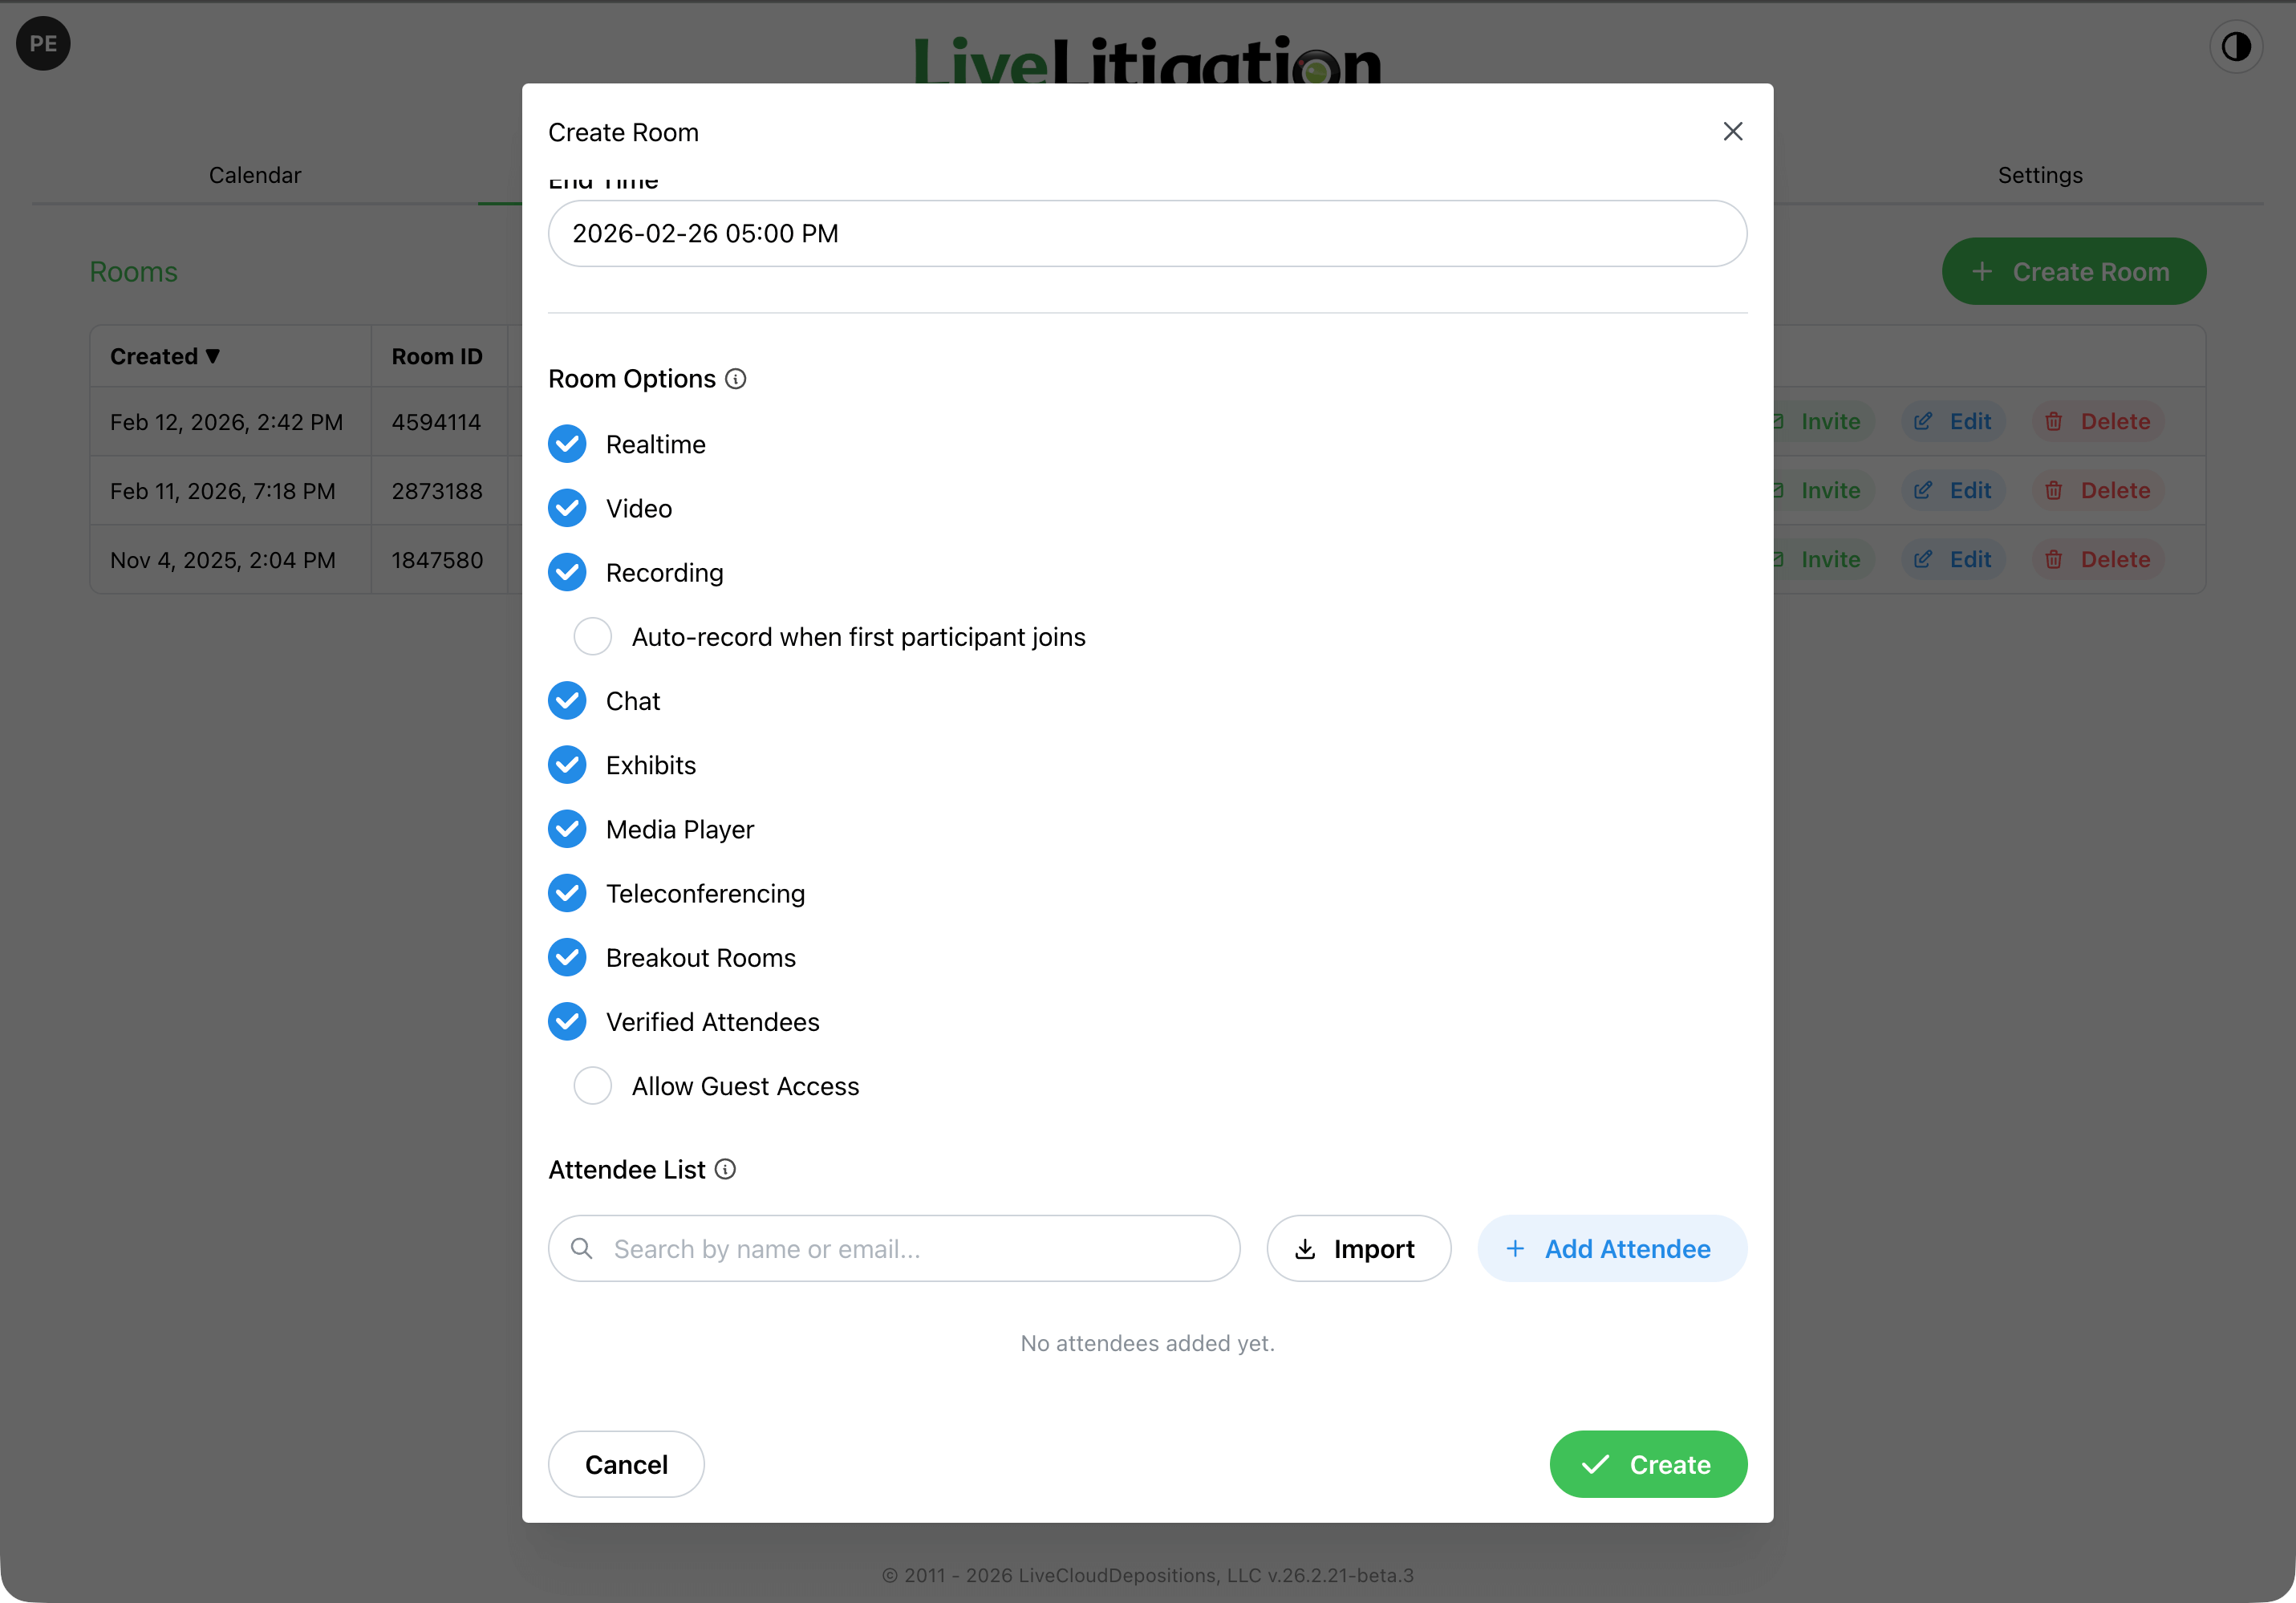
Room Access decides who is allowed in:
Under Invite + Guests, a Guest Access Mode appears:
BEST PRACTICE: Invite + Guests handles the unexpected arrival
Invite Only is the tighter policy and the right choice when the attendee list is final. When someone not on the list may still need to join, a paralegal, a second chair, or a replacement videographer, Invite + Guests lets them in with limited access, and a Host can grant what they need from inside the room (see the Playbook). Under Invite Only, an unlisted arrival means editing the room before they can get in.
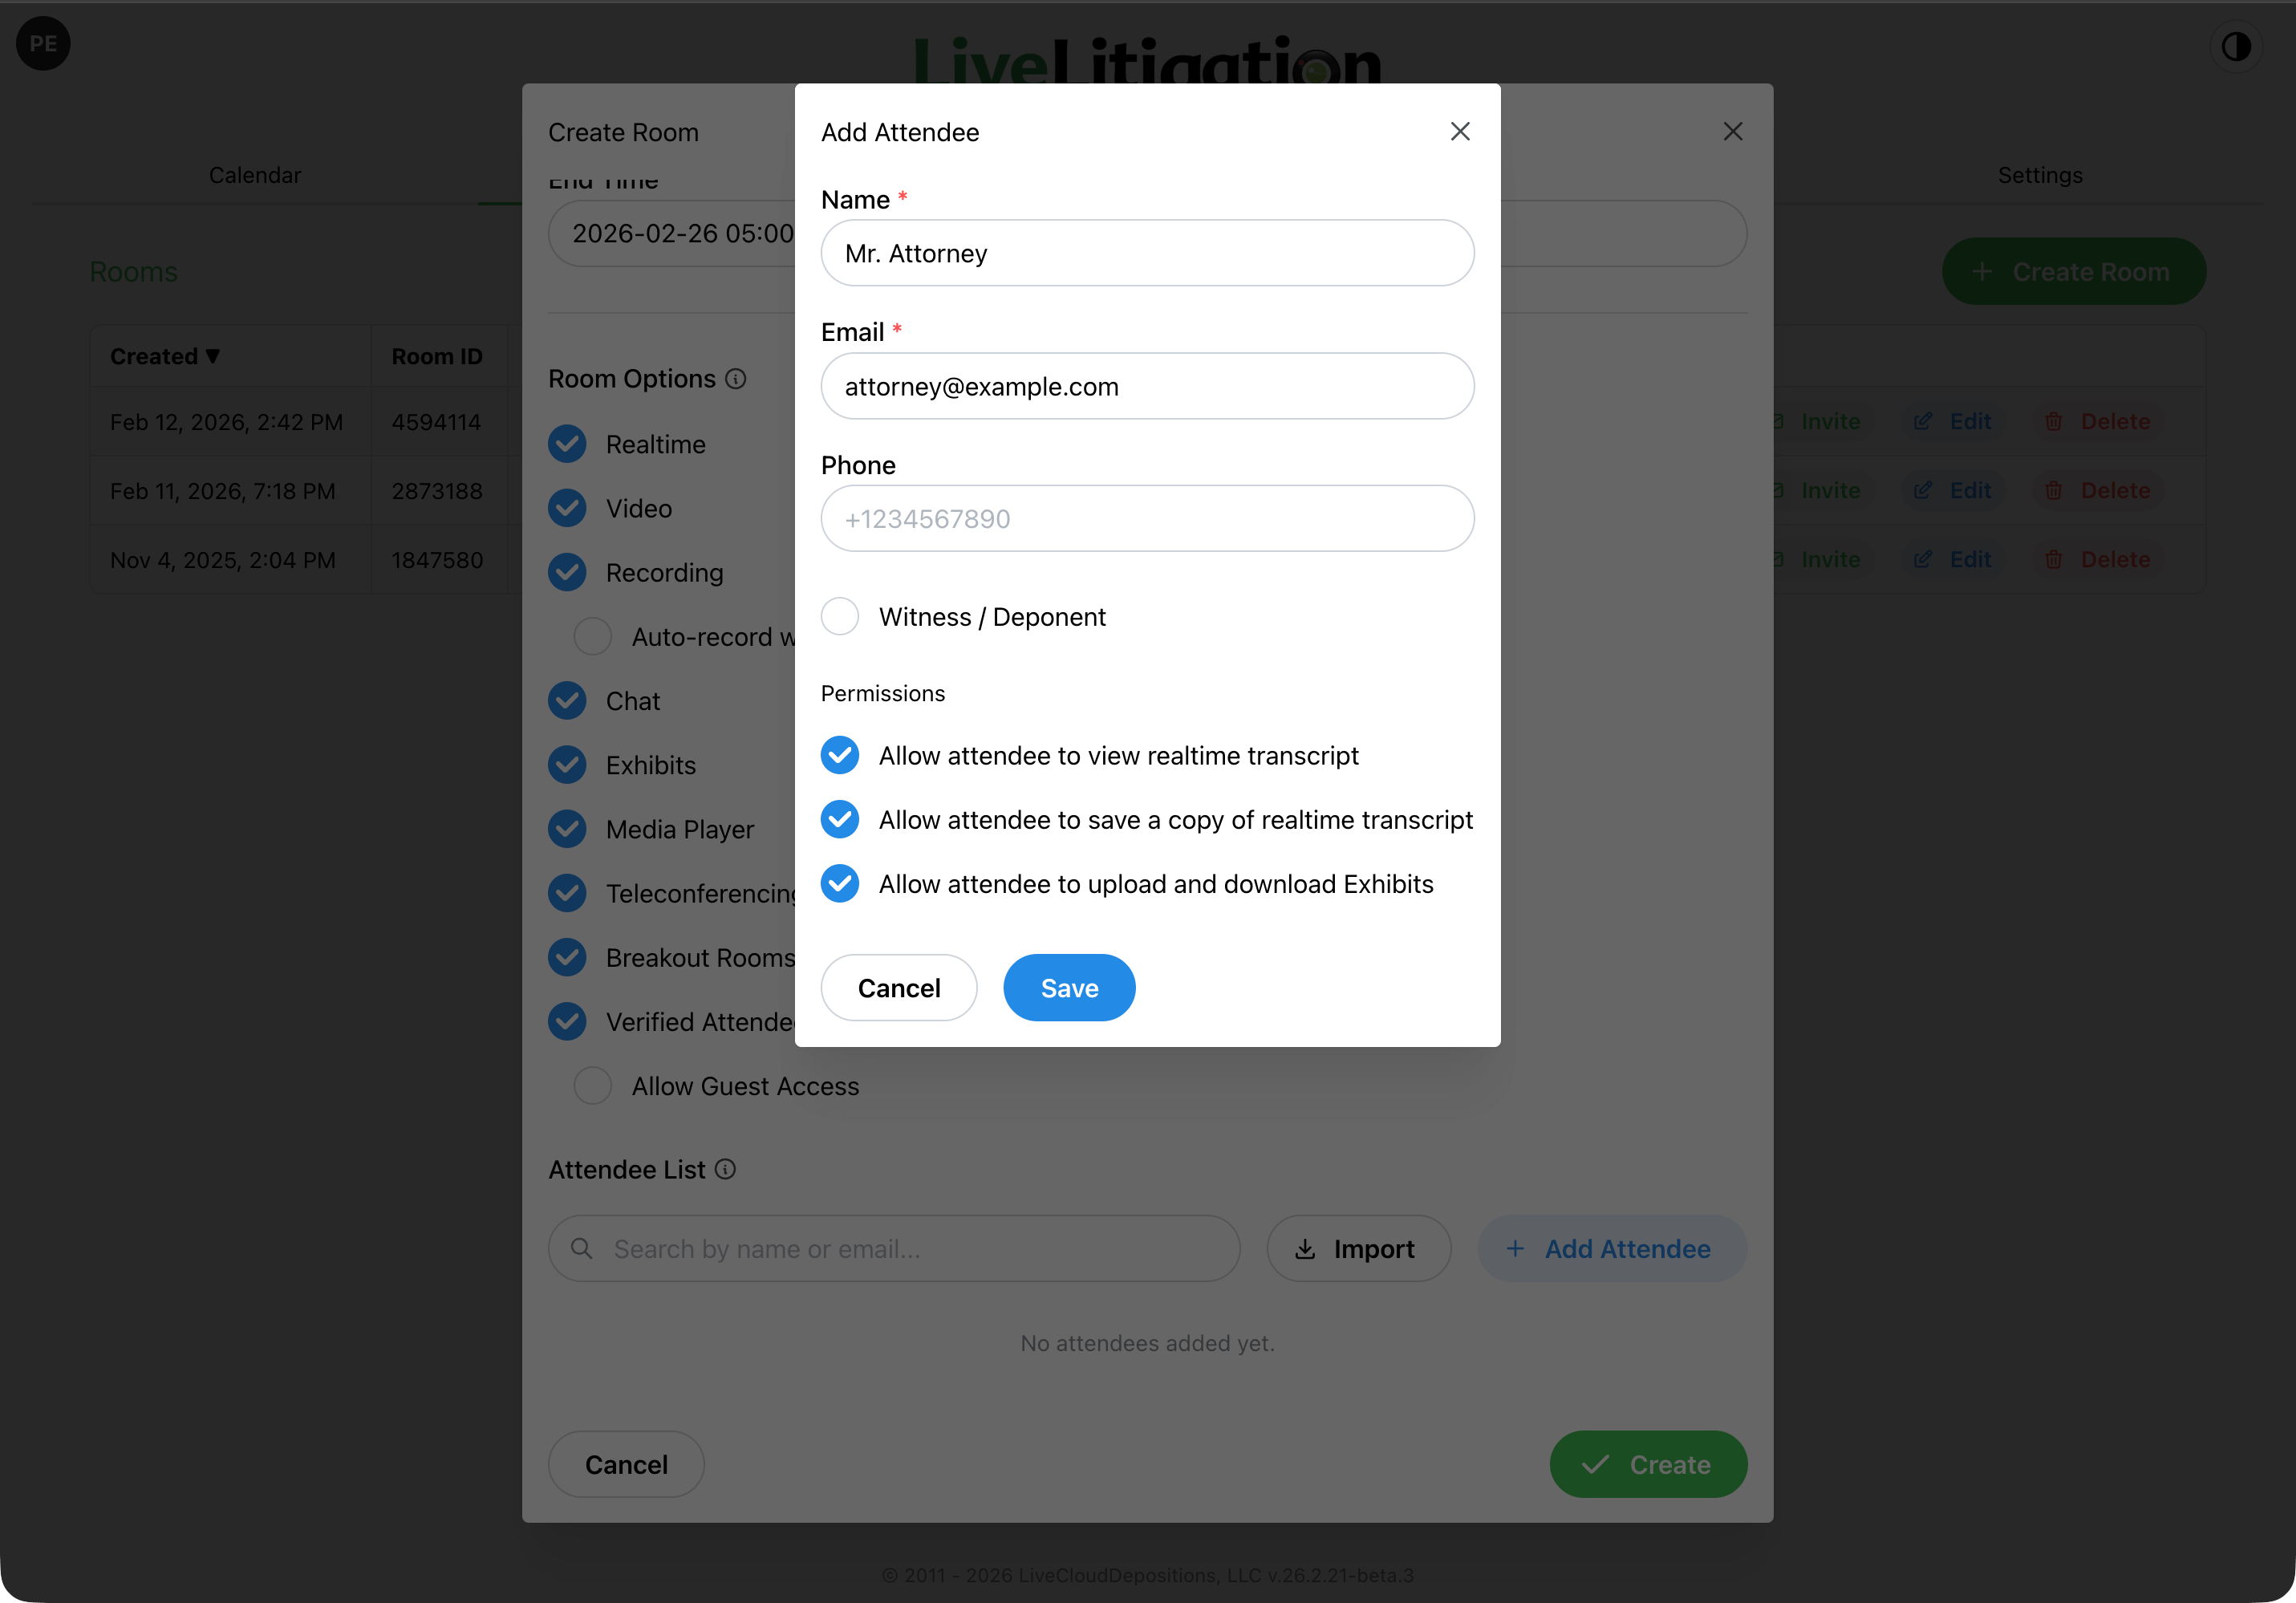
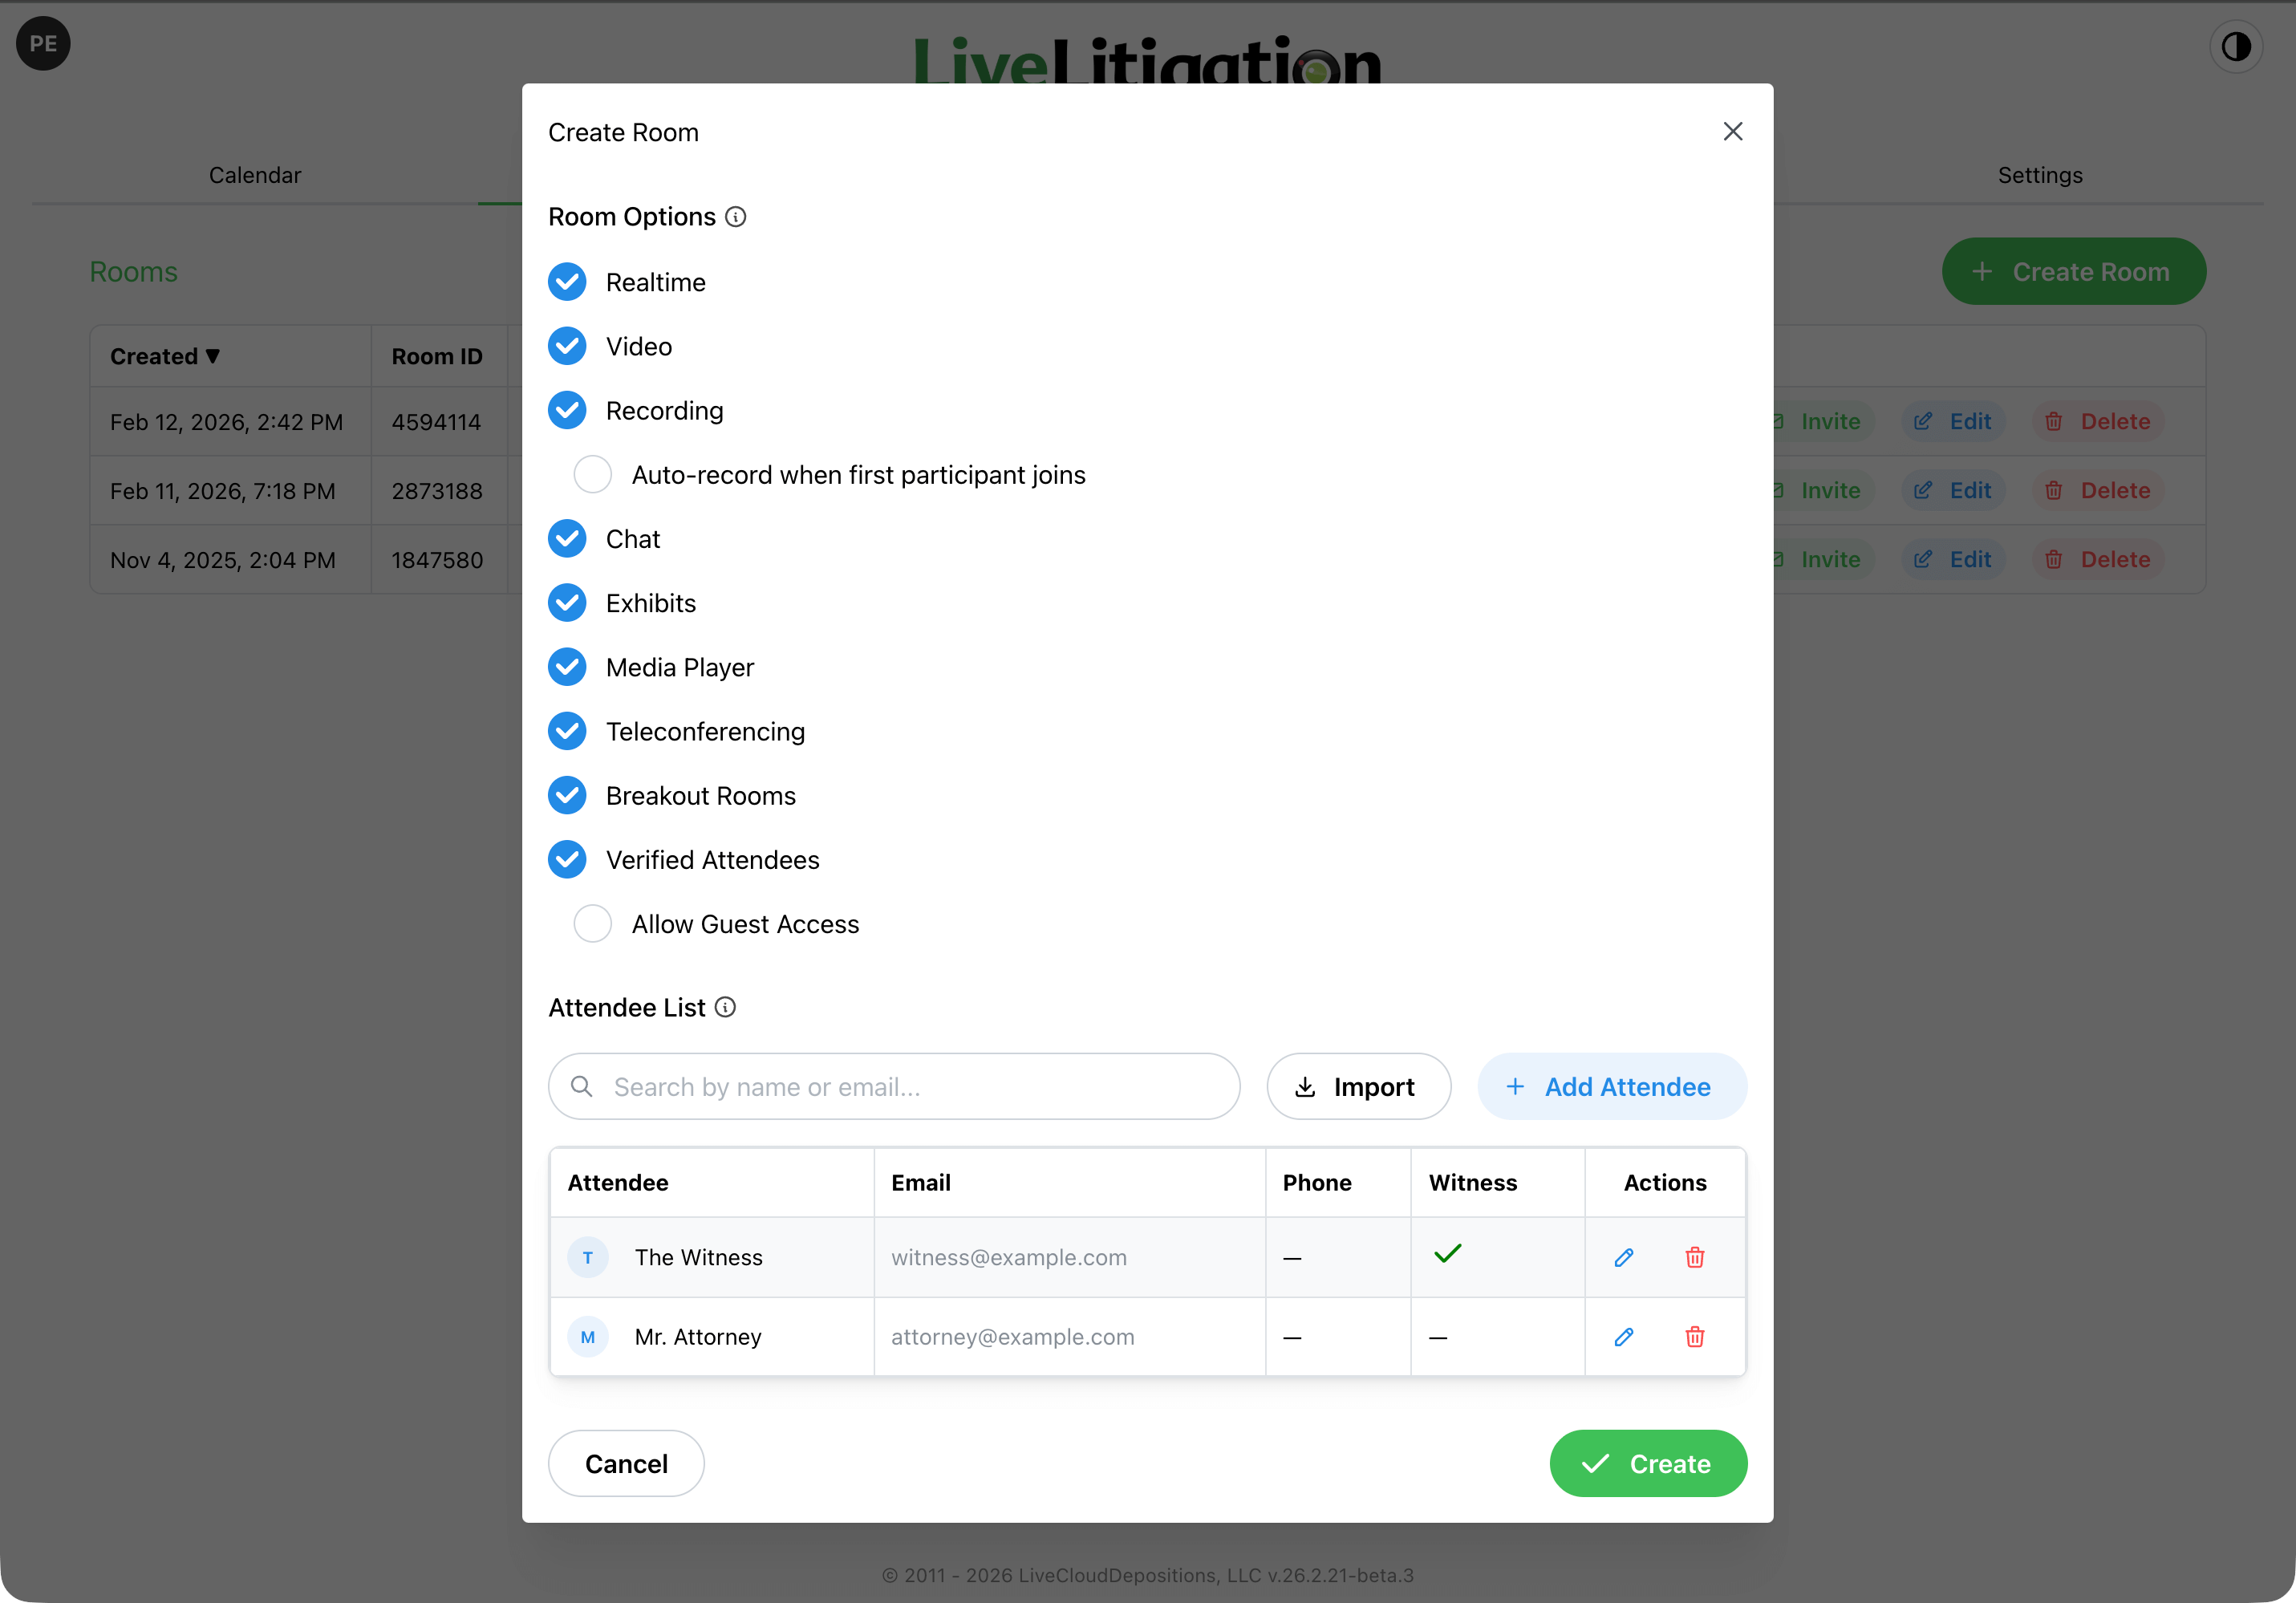
Selecting Invite Only or Invite + Guests reveals the Attendee List. Add people one at a time with Add Attendee, or use Import to pull the attendee list from a previous room (duplicate emails are merged automatically). With Clio connected, you can also fill an attendee straight from your Clio contacts.
Name and Email are required; Phone is optional and is what makes SMS invitations possible later.
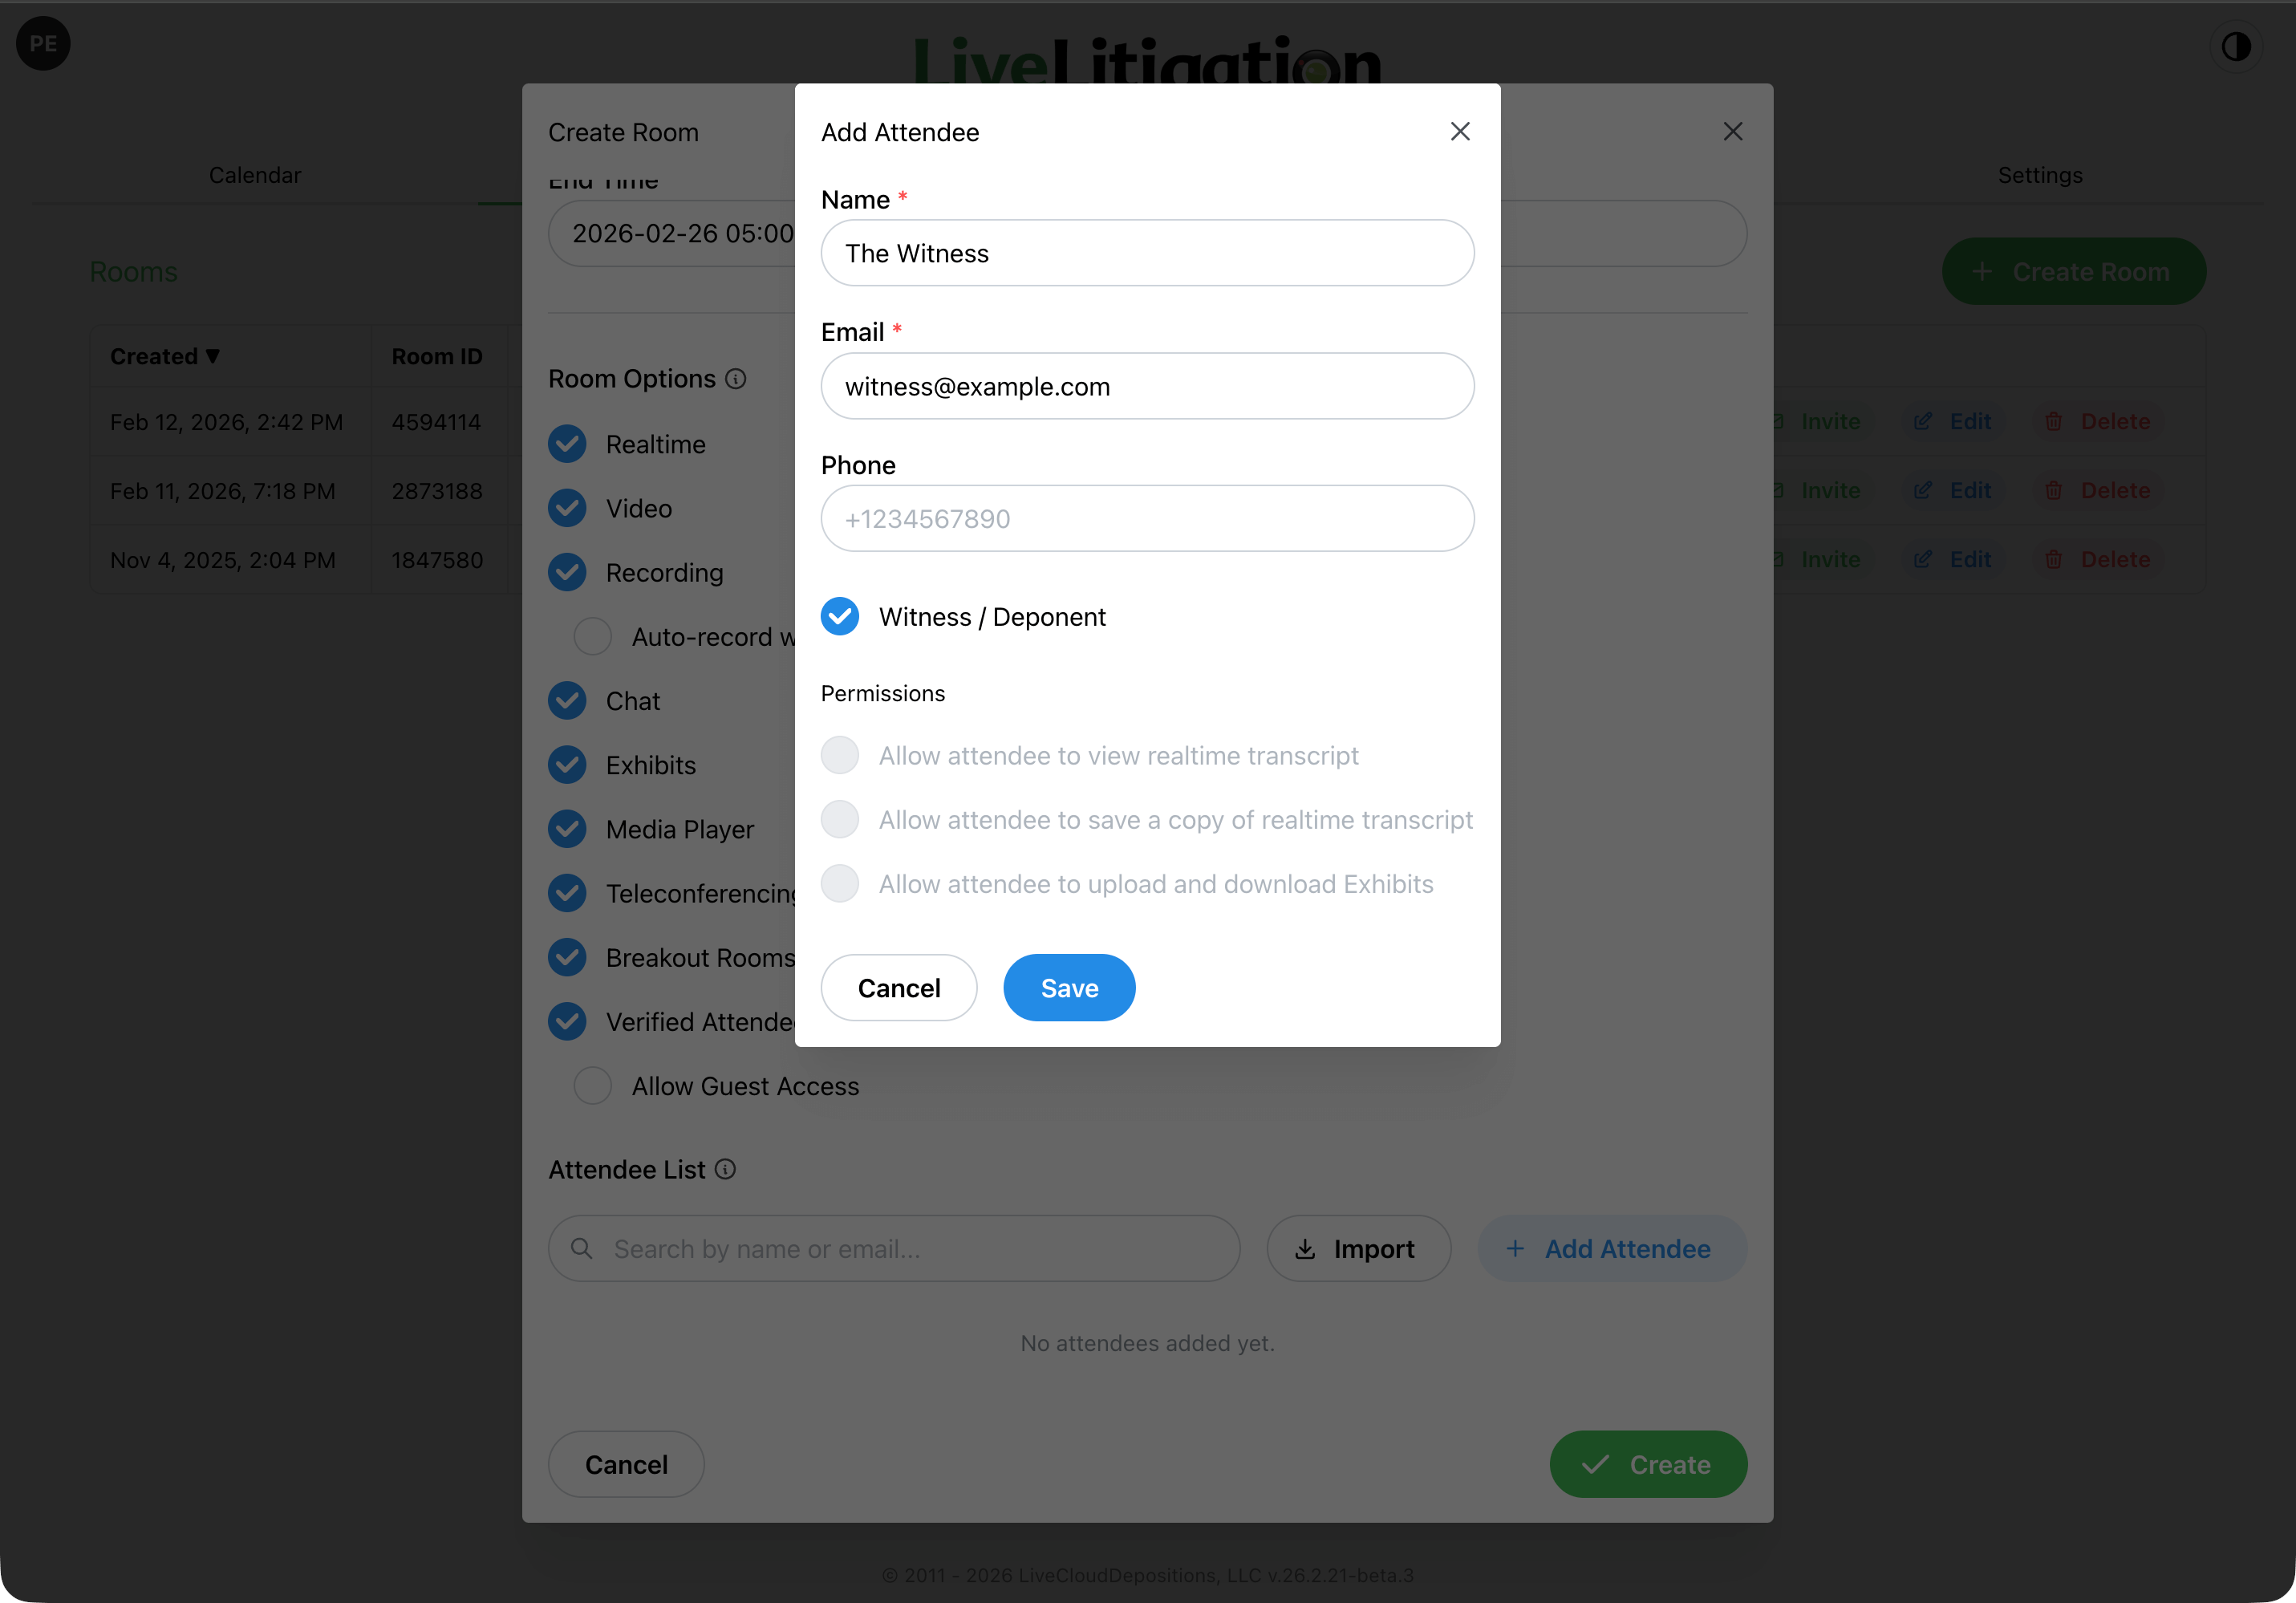
Assign the role that matches the person’s part in the proceeding. Roles are mutually exclusive: ticking one clears any other.
BEST PRACTICE: Three roles change how the room behaves; the rest are labels
Witness, Videographer, and Observer alter the room itself: the witness is pinned and separated from deposing counsel, the videographer gets the recording interface, and the observer is stream-only. Deposing Counsel adds one rule, no private contact with the witness. Opposing Counsel and Court Reporter carry no restrictions. Setting those labels is still worthwhile, since they appear on the roster during the event and in your usage reports afterwards.
BEST PRACTICE: A videographer who is also hosting should be added as a Co-Host
If the person running the video is also the one managing attendees and starting and stopping the recording, add one entry and tick Co-Host rather than Videographer. When they enter their code, the verification screen offers them Continue as Host or Join as Videographer, so they can open the same link on a second device and take the recording feed there while their host session stays open on the first. One entry covers both seats.
Under Permissions, each attendee can be allowed to view the realtime transcript, save a copy of the realtime transcript, and upload and download exhibits.
Choosing a role sets these for you: most roles switch all three on, while Witness and Videographer clear all three and Observer removes them entirely. Set the role first and adjust the permissions afterwards, since changing the role rewrites them.
Team is a free-text label such as “Defense” or “Plaintiff.” Same-team attendees get a private team chat and can share exhibits with just their team. Matching ignores case, and your account’s saved team names appear in the dropdown.
GOOD TO KNOW: A witness is never placed on a team
The Team field is hidden for the witness, and designating an existing attendee as the witness clears any team they had. This is what keeps the counsel and witness separation intact, since a witness on the Defense team would otherwise receive the Defense team chat.
Under Room Features, Transcript is a single choice rather than a set of checkboxes. Pick one source:
Then select the features you intend to use:
GOOD TO KNOW: Other features depend on Video / Audio
Speech-to-Text and Recording both rely on it. Turning Video / Audio off clears Speech-to-Text, Recording, and Auto-record, because there is no audio left to transcribe and nothing left to record. If a setting you enabled has disappeared, check Video / Audio first.
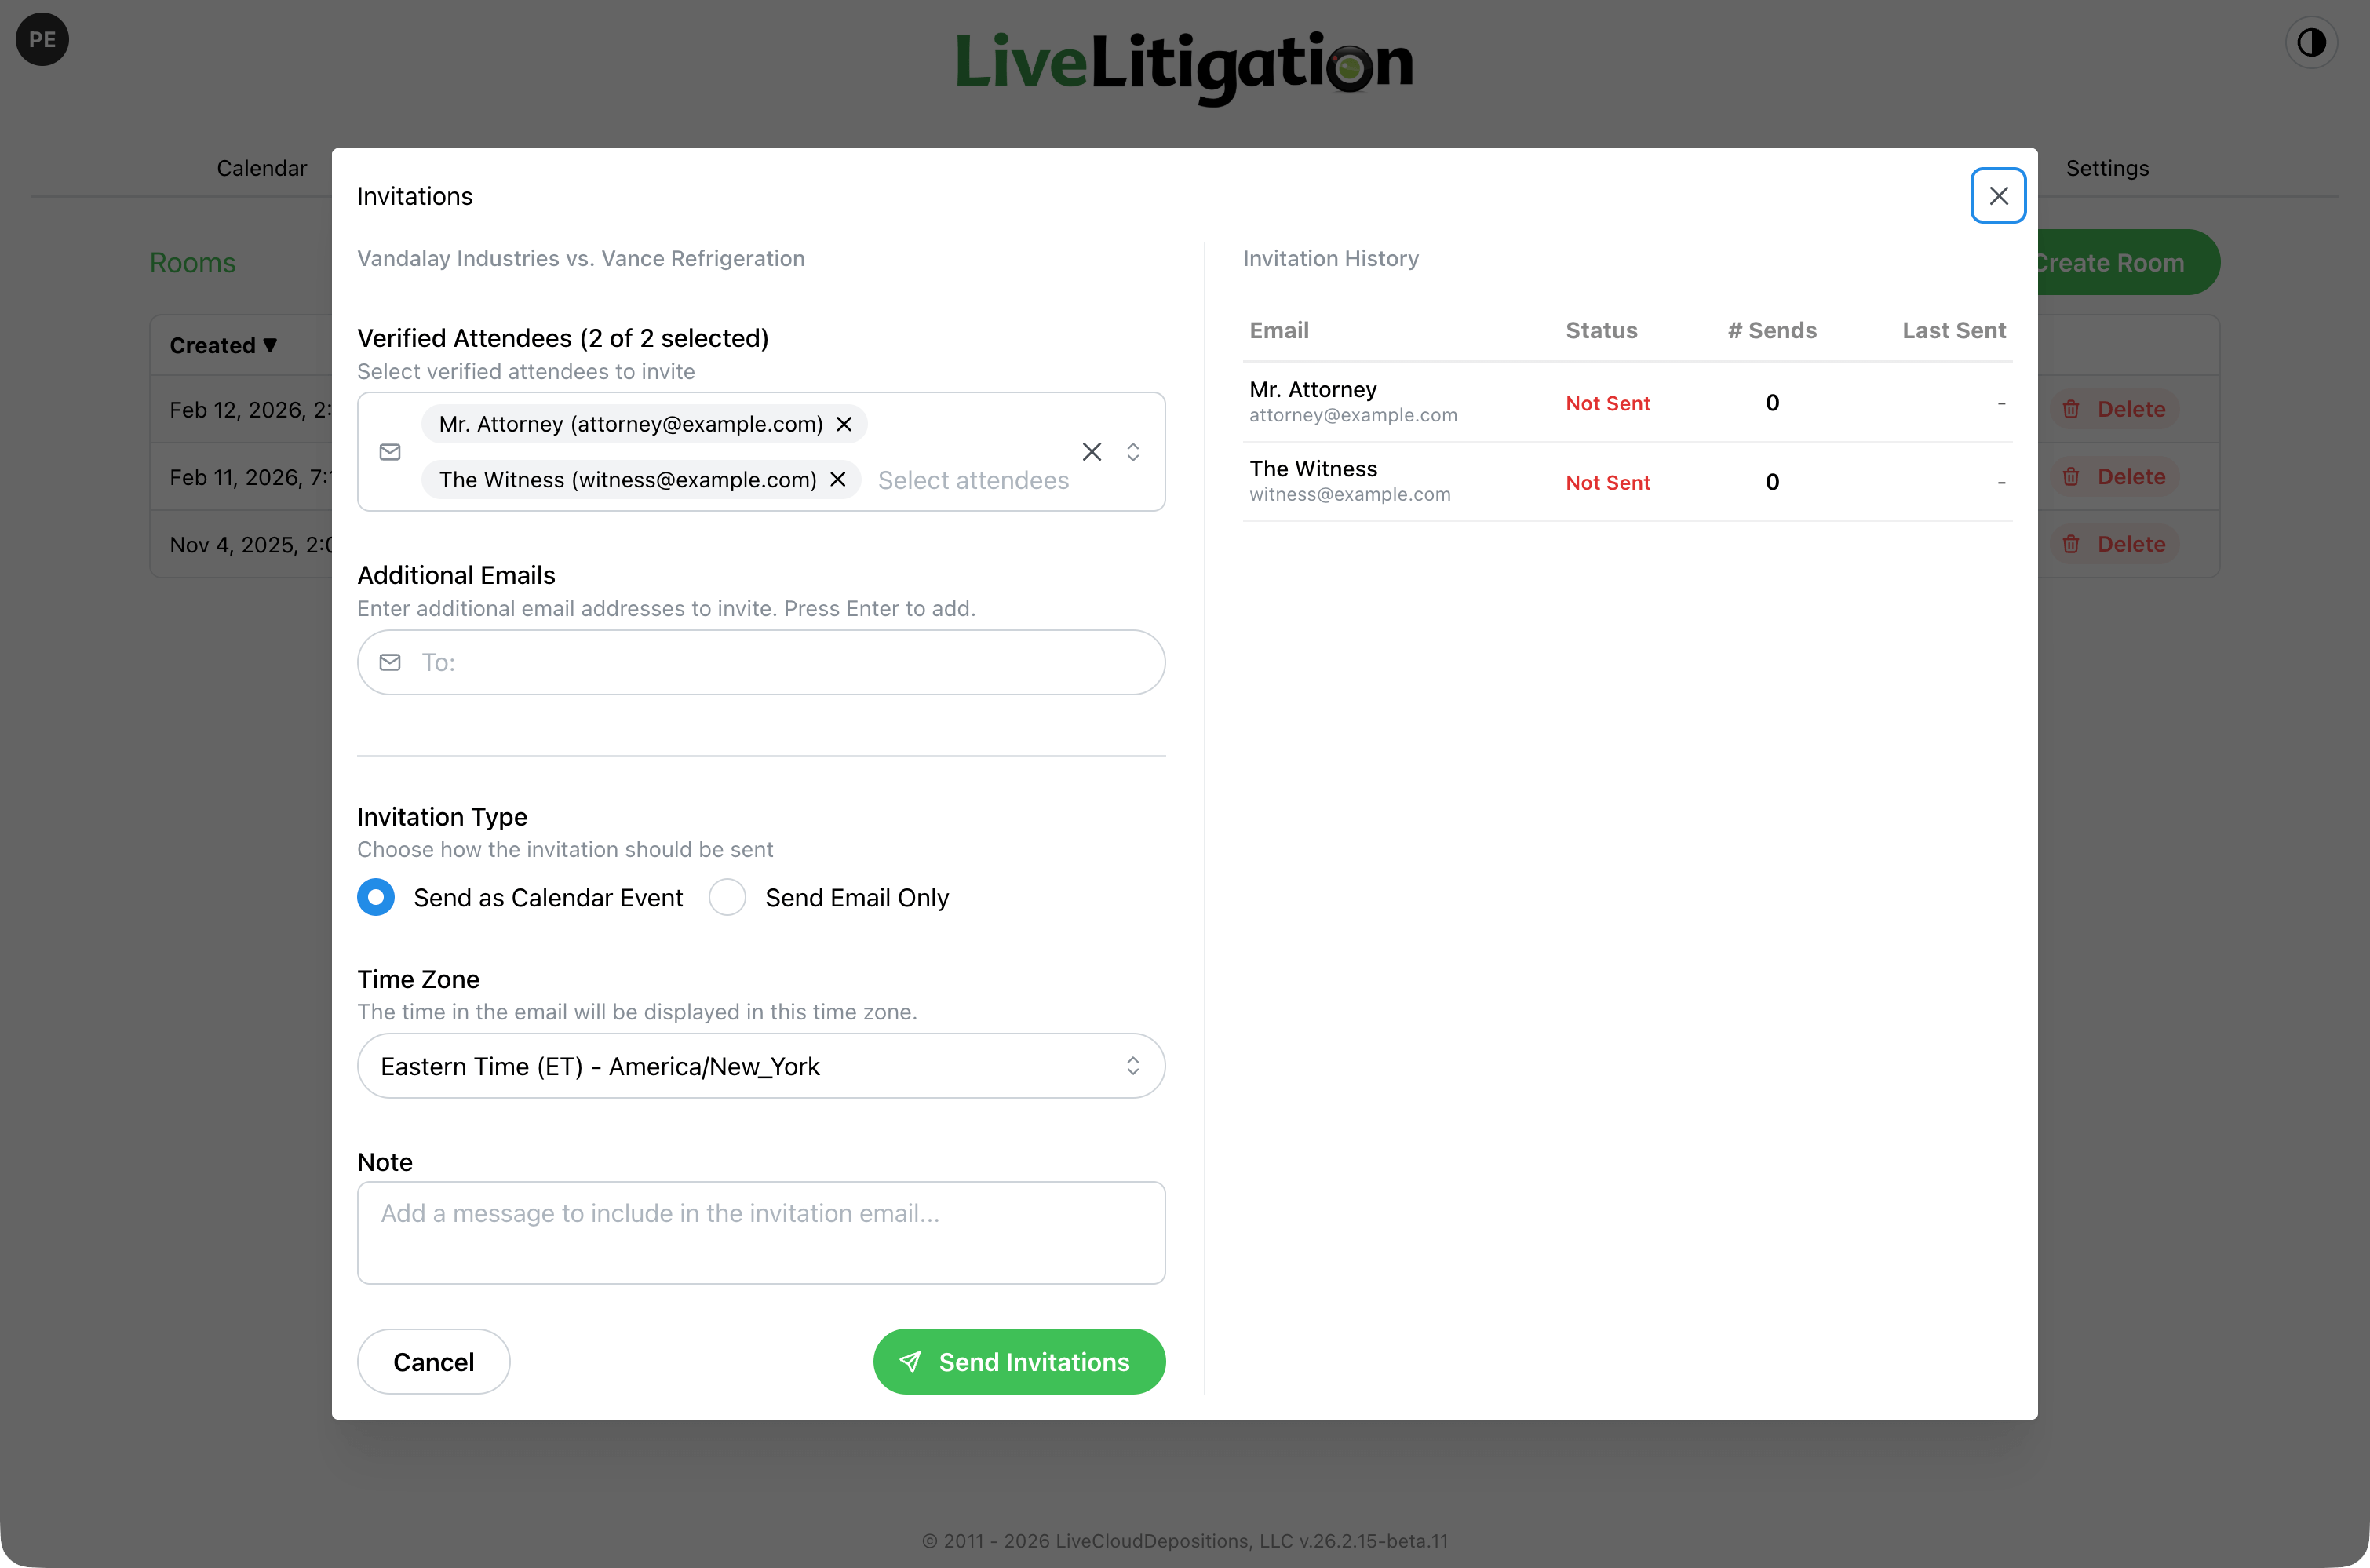
Enable Recording to capture the session for later review and download. Auto-record begins capture automatically as soon as the first participant joins.
What to record offers two mutually exclusive modes:
Composite layouts available:
Burn In Timestamp draws a running MM:DD:YY HH:MM:SS clock into the corner of the recording. It is not visible in the room, it is available on the Witness Only, Witness + Exhibits, and Speaker + Exhibits layouts only, and it does not apply to individual streams.
BEST PRACTICE: For a deposition, record composite layouts
Witness Only, Witness + Exhibits, Speaker + Exhibits, and Grid cover what a deposition is actually asked for afterwards, and since you can record up to four layouts at once you can take all four. Witness Only is the one a transcript is usually checked against; pair it with Burn In Timestamp when the record may need to be cited by time. Individual Streams is for specialised work involving deliberate post production, where each participant is edited separately. It is not the right choice for a proceeding.
BEST PRACTICE: Have a host start and stop the recording with the record
The cleanest file is one that starts when you go on the record and stops when you go off it, so breaks and off-record discussion never enter it. That needs a host in the room following the proceeding rather than a timer. Each on-record stretch produces its own recording, and they do not have to stay separate: afterwards, select the parts in Recordings and choose Combine, which joins them into a single file marked Combined. Combining needs the same plan level as recording multiple composite layouts.
GOOD TO KNOW: Auto-record trades a clean recording for a guaranteed one
Auto-record begins capture when the first participant joins, so nothing depends on someone remembering. It also captures everything before the proceeding starts and through every break. Leave it off when a host is managing the record, and turn it on when nobody will be driving the recording, or when observers are invited, since an observer sees nothing while the recording is stopped.
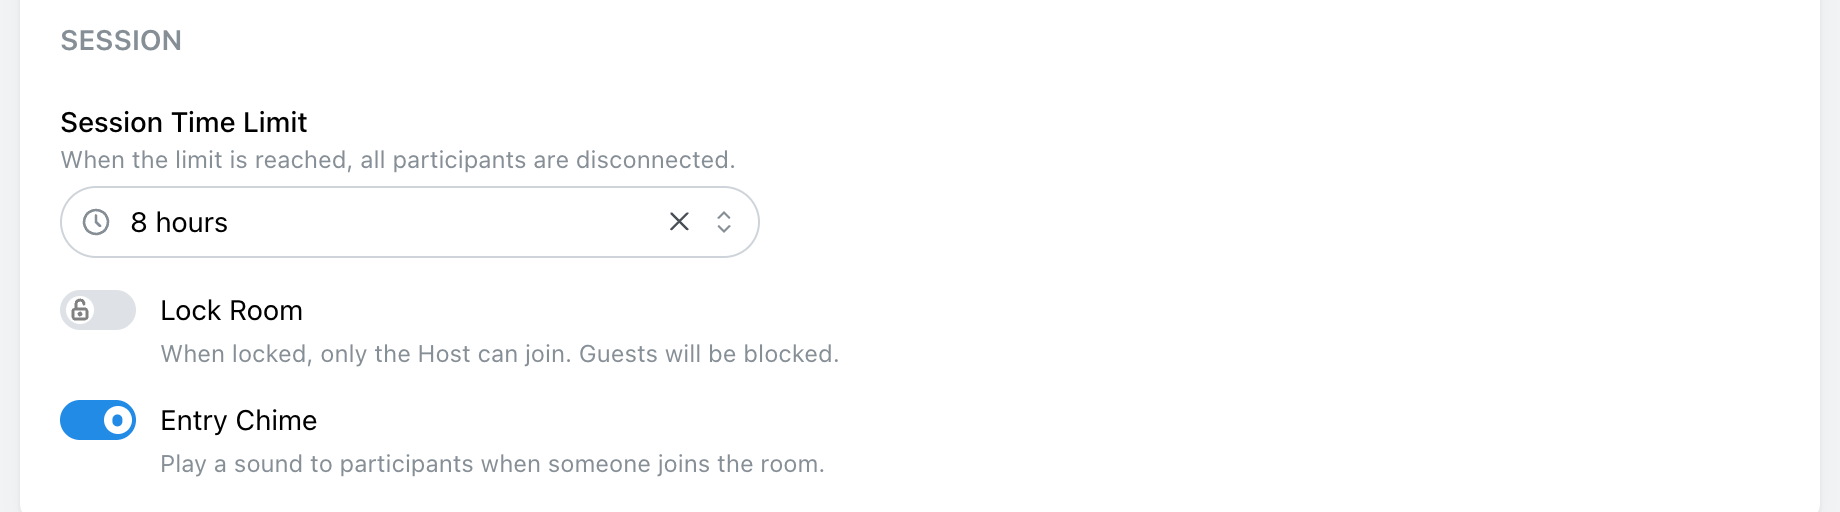
At the bottom of the form, Session holds the room’s live controls:
GOOD TO KNOW: The session limit disconnects everyone, without warning
There is no grace period, so a deposition scheduled for four hours that runs long is cut off at a four-hour limit. Set the limit to the longest the day could plausibly run, or leave it at no limit.
BEST PRACTICE: Consider turning the entry chime off for testimony
It is helpful in meetings, but during testimony a late arrival announcing itself can land in the middle of an answer.
Click Create. Everything here can be changed afterwards with Edit.
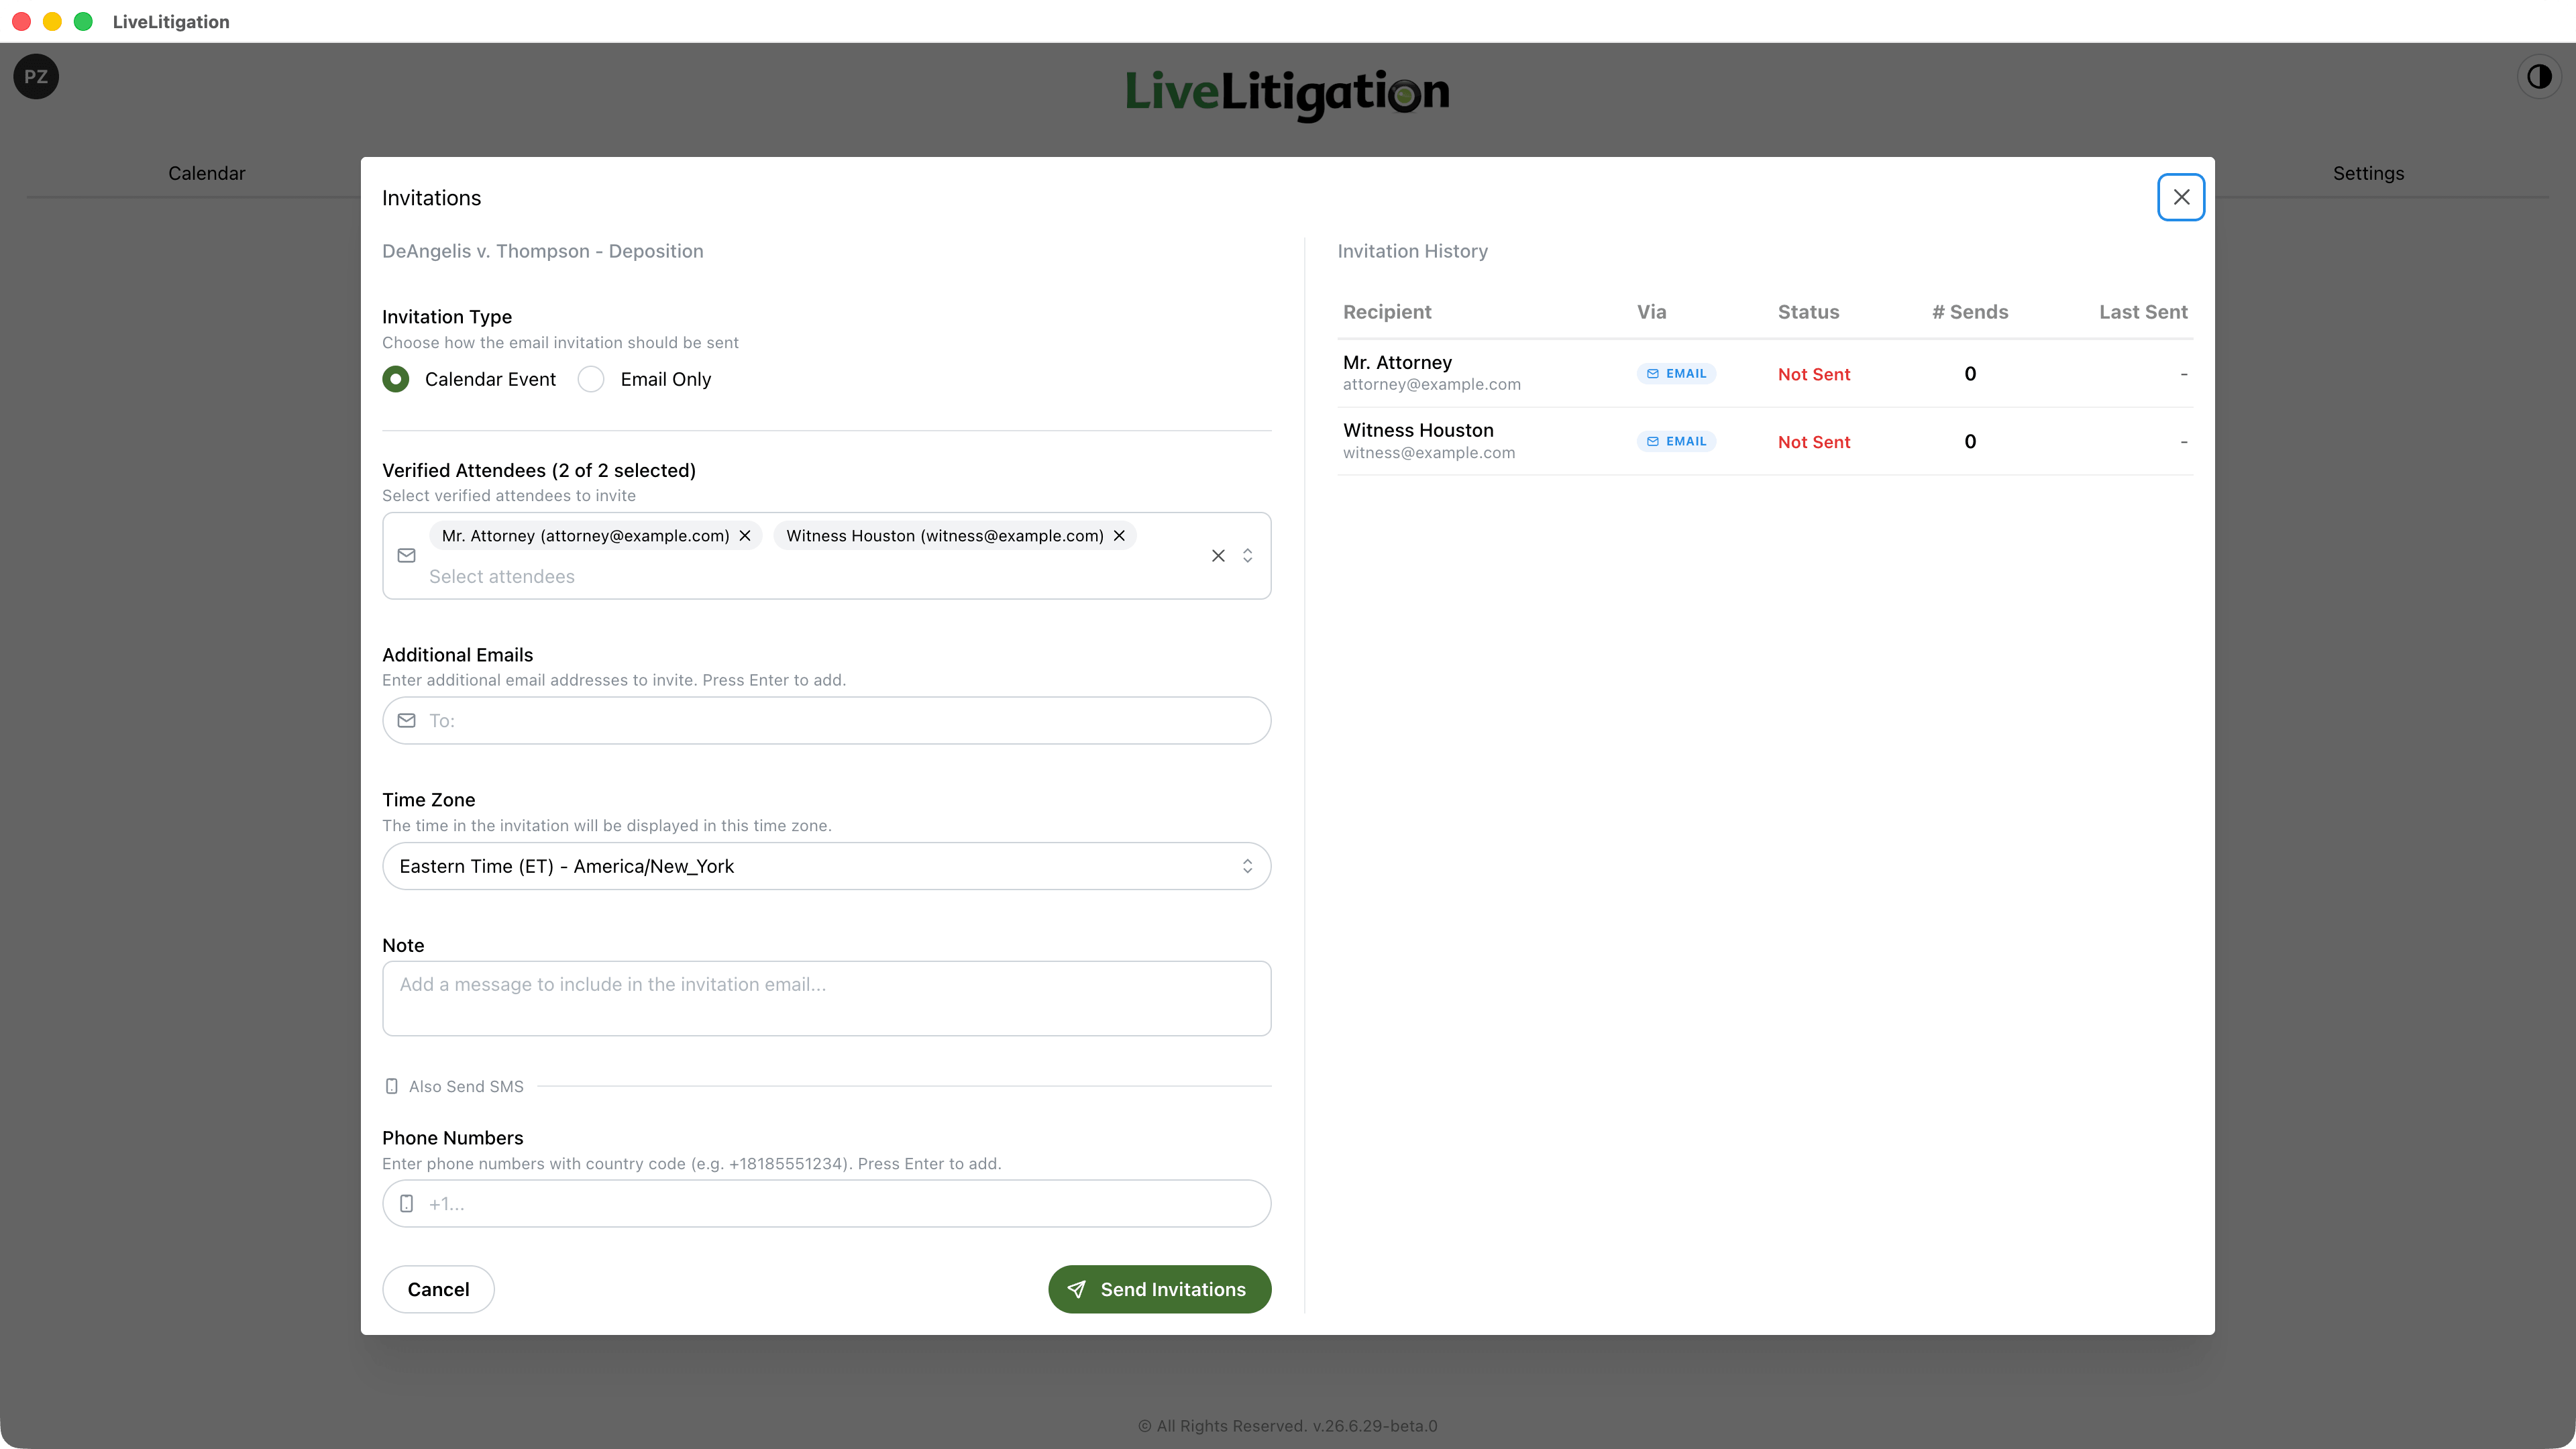
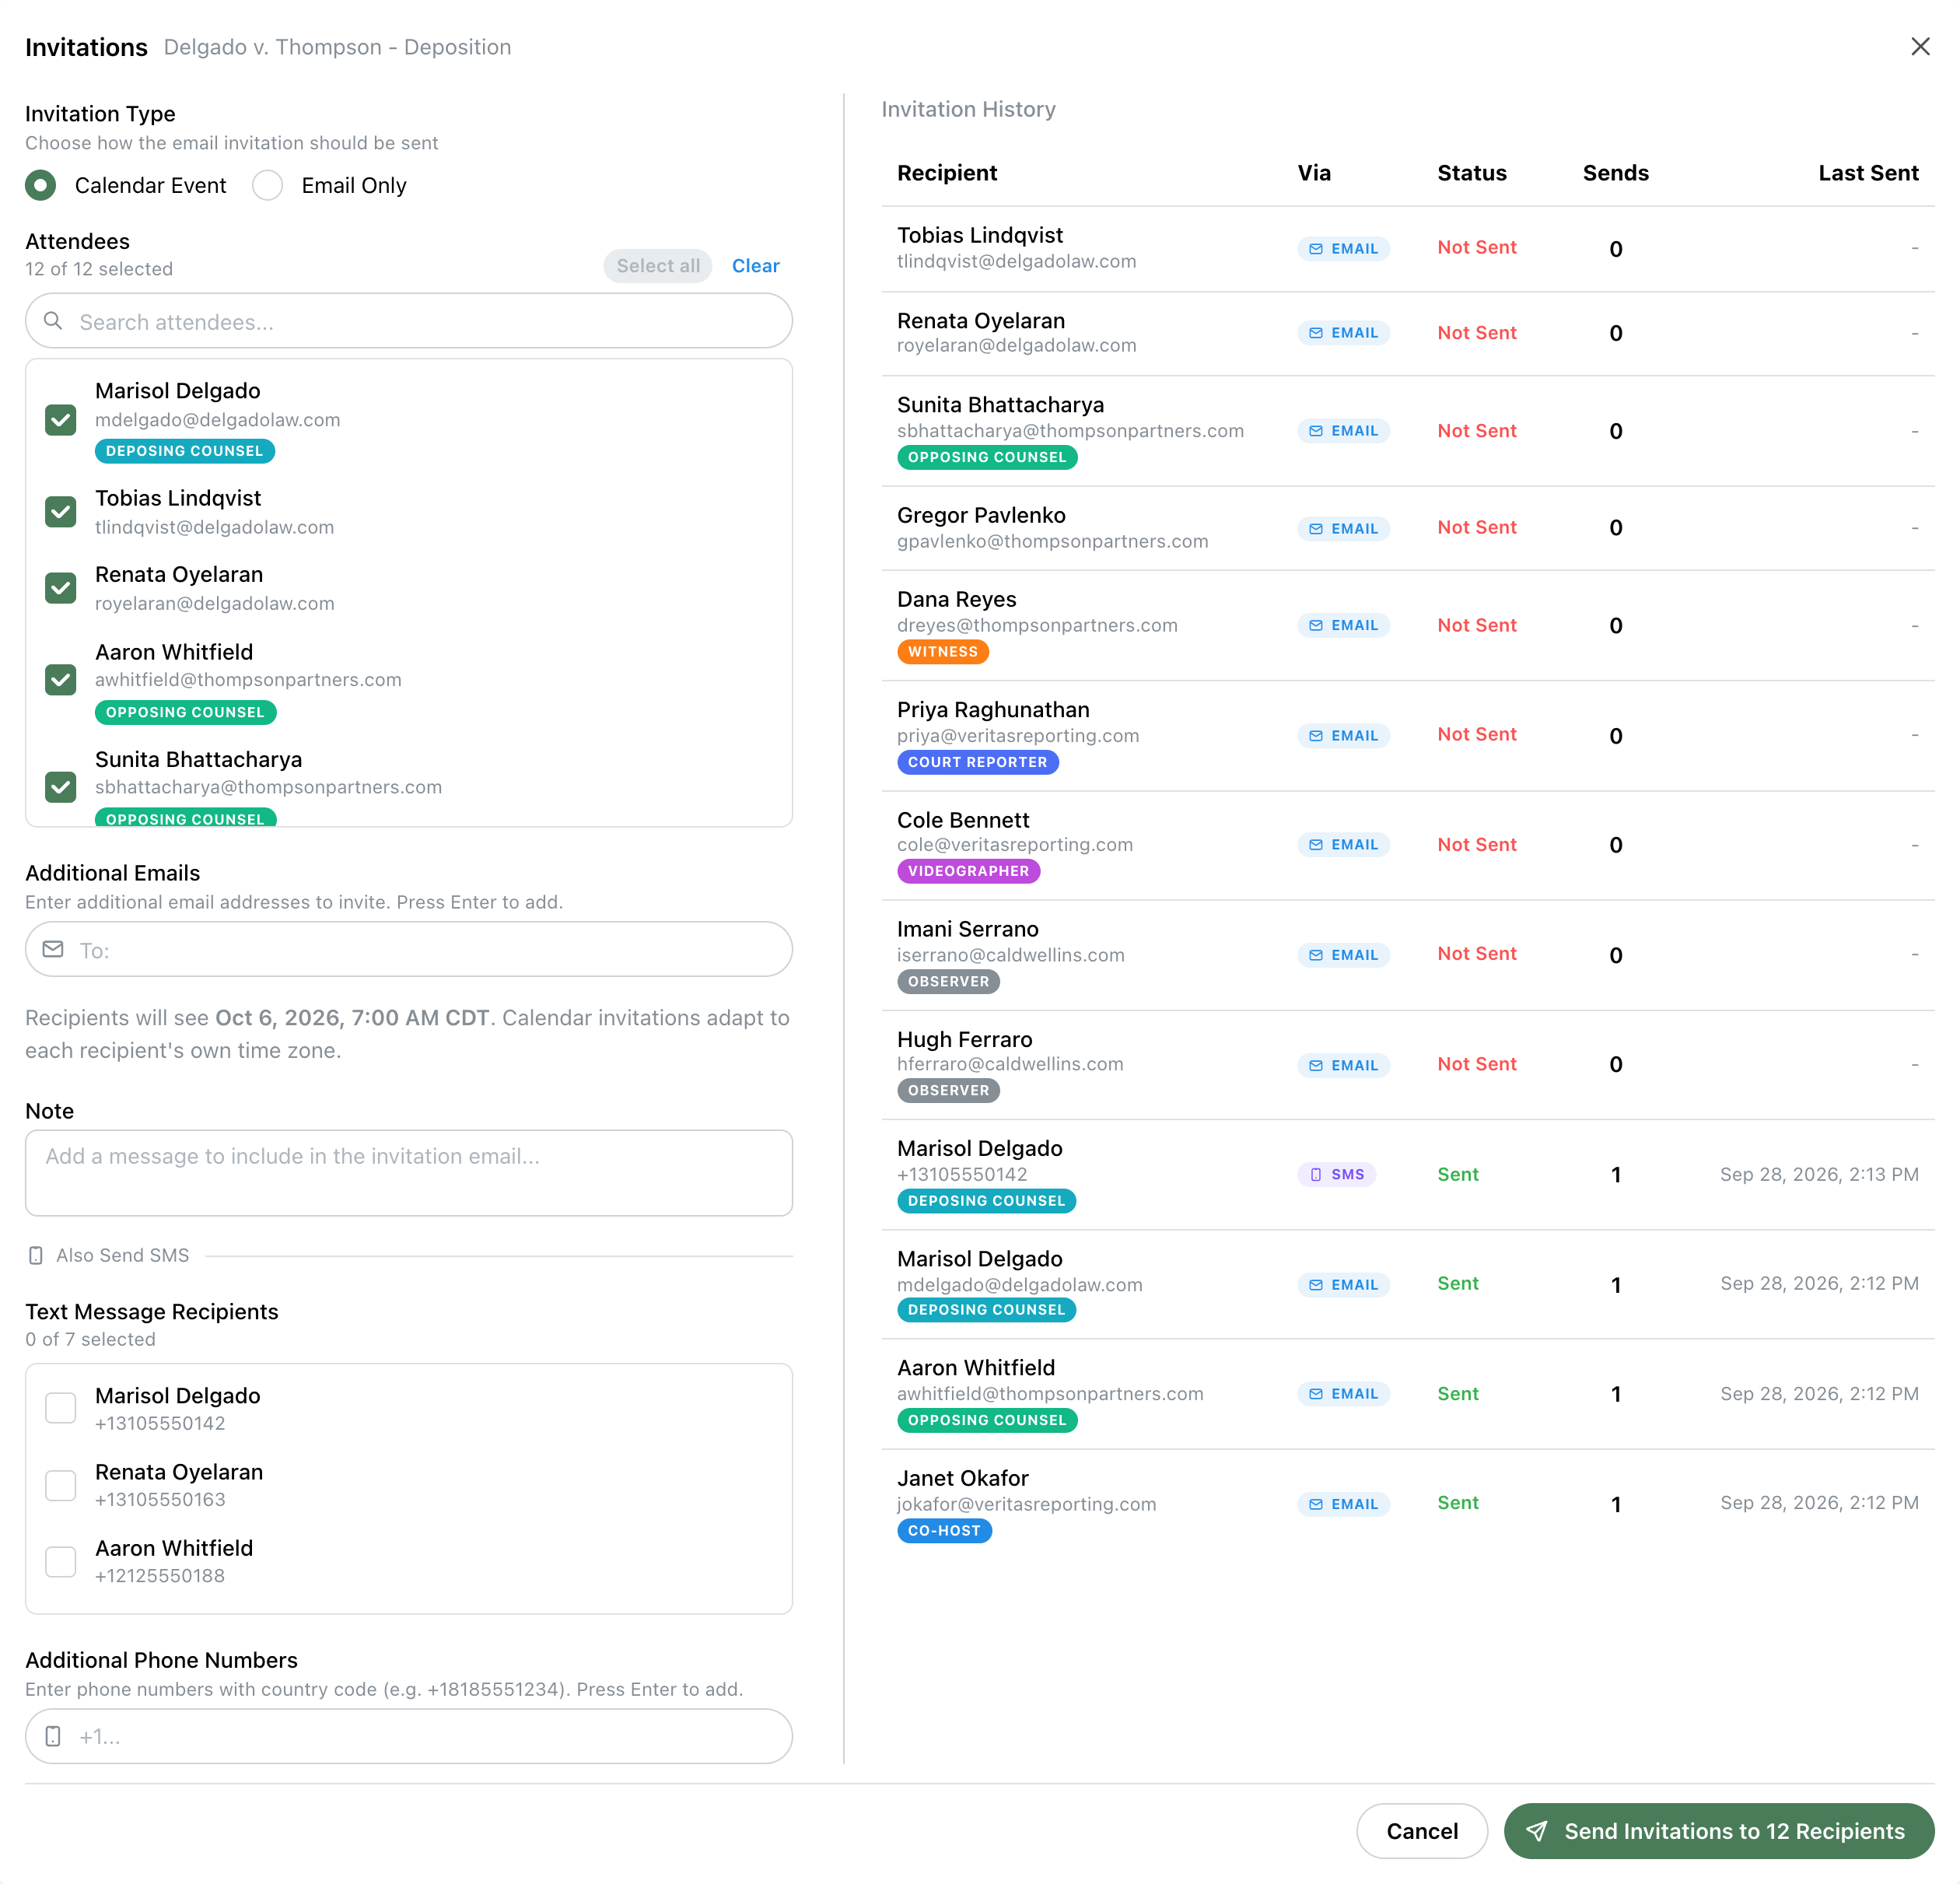
Select the room and click Invite. Immediately after creating a room, eSuite also offers to open this for you.
For a scheduled room, the modal states the start time in the room’s time zone and notes that calendar invitations adapt to each recipient’s own zone. There is nothing to set here: the invitation carries the real instant.
Invitation History tracks each recipient, how they were contacted, whether it was sent, how many times, and when.
BEST PRACTICE: Re-send the calendar invitation after a reschedule
The invitation is a calendar event, so re-sending updates the entry already sitting on each attendee’s calendar rather than creating a second one. Changing the room’s time without re-inviting leaves attendees holding the old time.
GOOD TO KNOW: The invitation is separate from the verification code
Everyone receives the same invitation regardless of role. The unique code that admits a verified attendee is sent separately, at the moment they try to join, to the email address on their attendee entry. Each attendee therefore needs their own correct address on their entry.
These situations span several steps, so they are collected here rather than attached to any one of them.
Videographer and host is handled for you. Add one attendee entry and tick Co-Host. When that person enters their code, the verification screen offers Continue as Host or Join as Videographer rather than carrying them straight into the room. They take the host seat on one device, open the same link on a second device, and choose the videographer feed there. One entry, one address, both seats, and the host session on the first device is untouched.
Use a second device, or a different browser on the same computer. The two views have separate controls and cannot both be driven from one seat.
Any other pairing, such as the court reporter who is also a co-host, still needs two separate attendee entries with two different email addresses, one for each role.
Roles are mutually exclusive, so a single entry cannot hold both. Two entries sharing one email address will not work either: the room identifies a verified attendee by their email address, so only the first entry would ever be reached. Give the second role its own address. A plus-tag on the same mailbox works well and still arrives in the same inbox, for example jsmith@firm.com for the co-host entry and jsmith+reporter@firm.com for the court reporter entry.
They then join twice, once per address, on two devices or in two browser windows.
A room can have only one witness. The attendee list enforces this: it will not tick a second Witness box, and asks you to remove the existing one first.
There are two ways to get a witness into a room:
The second path is what Invite + Guests makes possible. If the deponent’s email address is not known when you build the room, or a substitute witness appears on the day, they can join as a guest and a host can designate them.
GOOD TO KNOW: Designating a new witness in the room replaces the previous one
If someone is already the witness and a host designates somebody else, the first person stops being the witness. This is deliberate, since blocking the change mid-proceeding would be worse, but it does mean the witness-focused recording follows whoever was designated last. Check the roster after any in-room role change.
Two things a witness cannot be: a host, since that would give them host powers over their own testimony, and a member of a team.
Designating the witness is not just a label. It changes the room:
Without a designated witness, none of the above applies, and the witness-focused recording layouts have nobody to follow.
An Observer watches the live stream and nothing else, and that stream exists only while a recording is running. An observer who joins a room before recording has started will not see anything.
If you are inviting observers, enable Recording and Auto-record together. The same applies to View-Only guest access.
A host does not have to leave and edit the room to correct who someone is. From the participant list, a host can designate a witness, promote a guest to co-host, and correct a display name.
In-room changes apply to the session in progress and to the record of it, but they do not rewrite the saved attendee list. After the proceeding, update the room itself so the next day starts correctly.
GOOD TO KNOW: A host can correct a name, but not enter an email address
An attendee’s email address is their identity, confirmed by a code sent to that address. A host typing one in would be asserting an identity rather than verifying it, so it is not offered. An attendee whose email is wrong is corrected on the room’s attendee list.
Explore the platform